多凯斯(DOCKCASE)DSWC1R-3S 智能屏显磁吸硬盘盒 簡単開封レビュー:MagSafe対応外付けストレージ、iPhone接続用モバイルHDD、ProRes動画の外部記録可能、ディスプレイ付きHDDケース、100W PD給電対応、10Gbps高速転送。
このHDDケースはノートパソコンやスマートフォンに接続する際、もう一つのType-Cポートから最大100WのPD急速充電を提供できます。つまり、ノートPCやスマホでHDDを使用しながら同時に充電が可能です。
レビュー動画: https://www.bilibili.com/video/BV13ERaYpEci/
- RIHAO USB4 HDDケース + HP FX900Pro 2TB SSD 簡単開封レビュー:https://blog.zeruns.com/archives/842.html
- Apple Mac Mini M4 ミニホスト簡易レビューと分解:https://blog.zeruns.com/archives/851.html
- ACASIS TBU405Pro Thunderbolt 4/3 HDDケース + WD SN7100 1TB SSD 開封レビューおよび分解:https://blog.zeruns.com/archives/857.html
製品仕様
| 項目 | 詳細 |
|---|---|
| 型号 | DSWC1R-3B |
| 供電インターフェース規格 | 100W PD |
| 停電保護時間 | 3秒 |
| ディスプレイサイズ | 1.54インチ 240×240 LCD |
| 材質 | アルミ合金、強化ガラス |
| サイズと重量 | 59.3\*59.3\*14.5mm (53.3g) |
| 同梱ケーブル | USB 3.2 Gen 2 Type-C to C データケーブル |
| インターフェース | USB 3.2 Gen 2 Type-C |
| 伝送速度 | 10Gbps |
| 供電要件 | 最大 5V±0.25V 3.0A |
| コントローラー方式 | RTL9210 |
| 対応SSDタイプ | Mキー M.2 SSD(NVMe/PCIe), B&Mキー M.2 SSD(NVMe/PCIe) |
| 対応SSD規格 | 2230 / 2242 |
| 対応SSD容量 | 最大2TB |
| システム要件 | Windows 7/8.1/10/11,macOS,iPadOS,Linux, Android、PlayStation 5、ChromeOS、HarmonyOS |
購入リンク:
- 京东:https://u.jd.com/61MQoCP
- 淘宝:https://s.click.taobao.com/4hSbrUs
- ピンドゥドゥオ:https://p.pinduoduo.com/IbwVq5Jb
開封&分解
外装箱表側

外装箱裏側

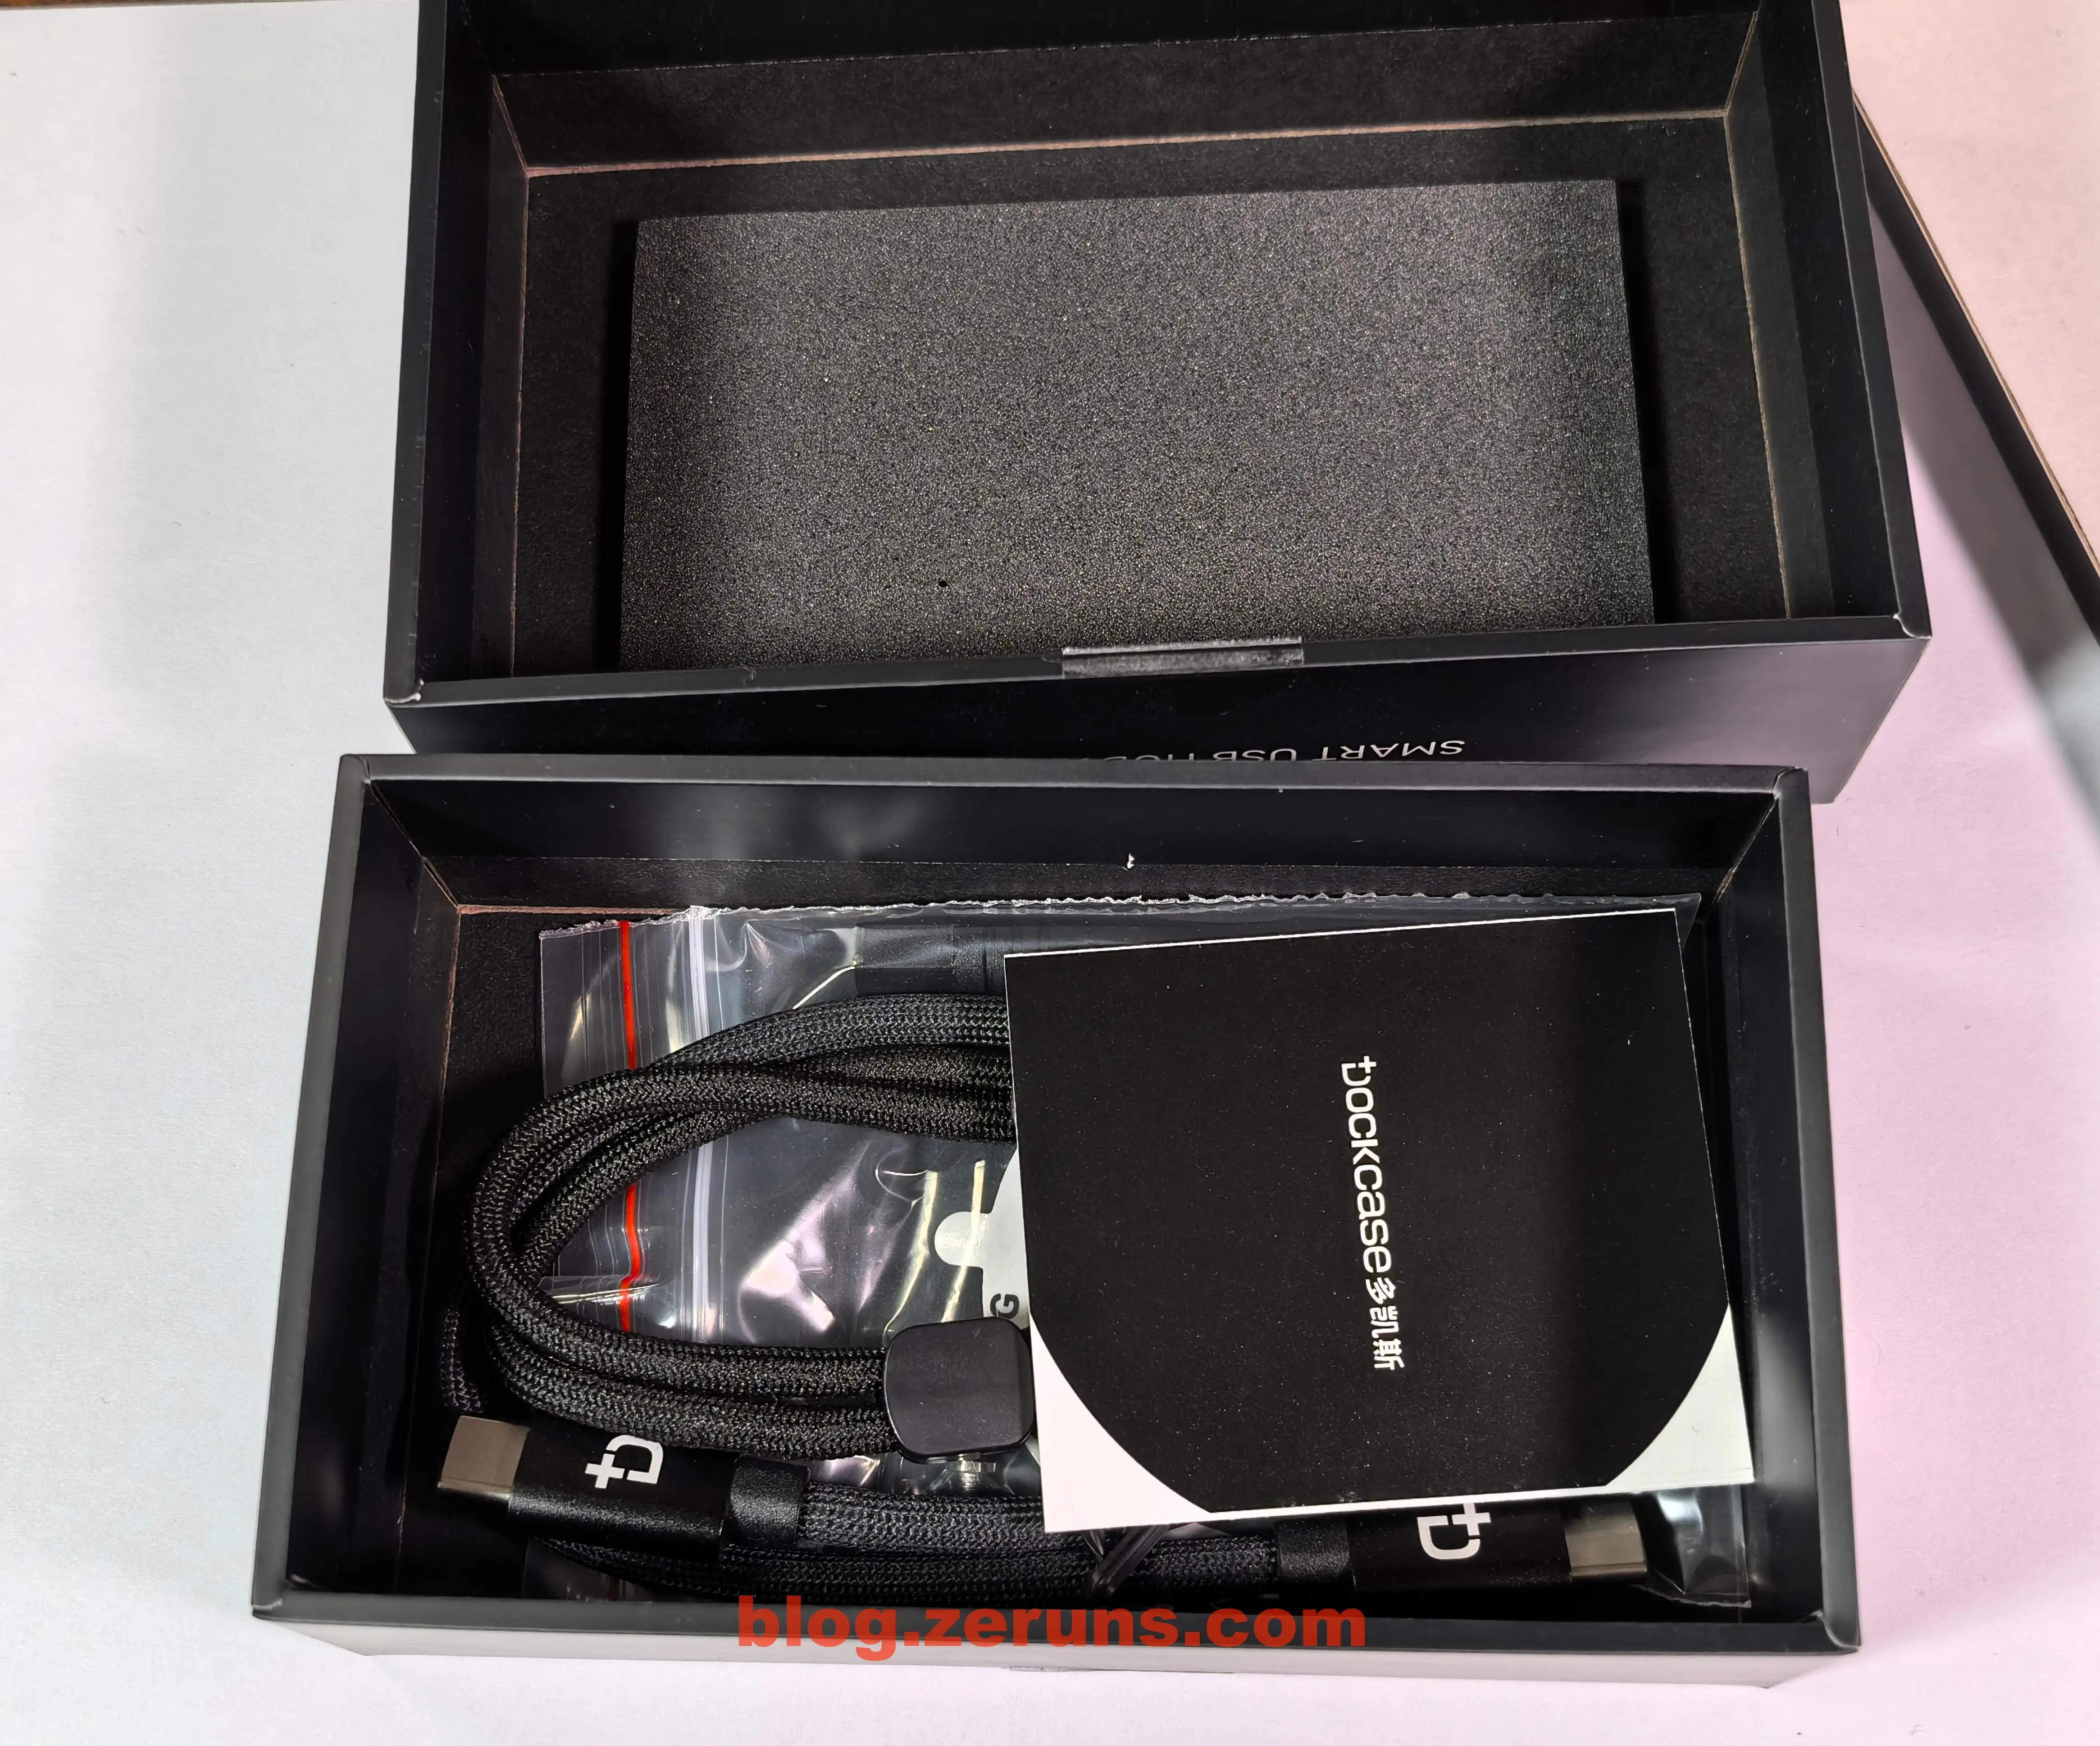
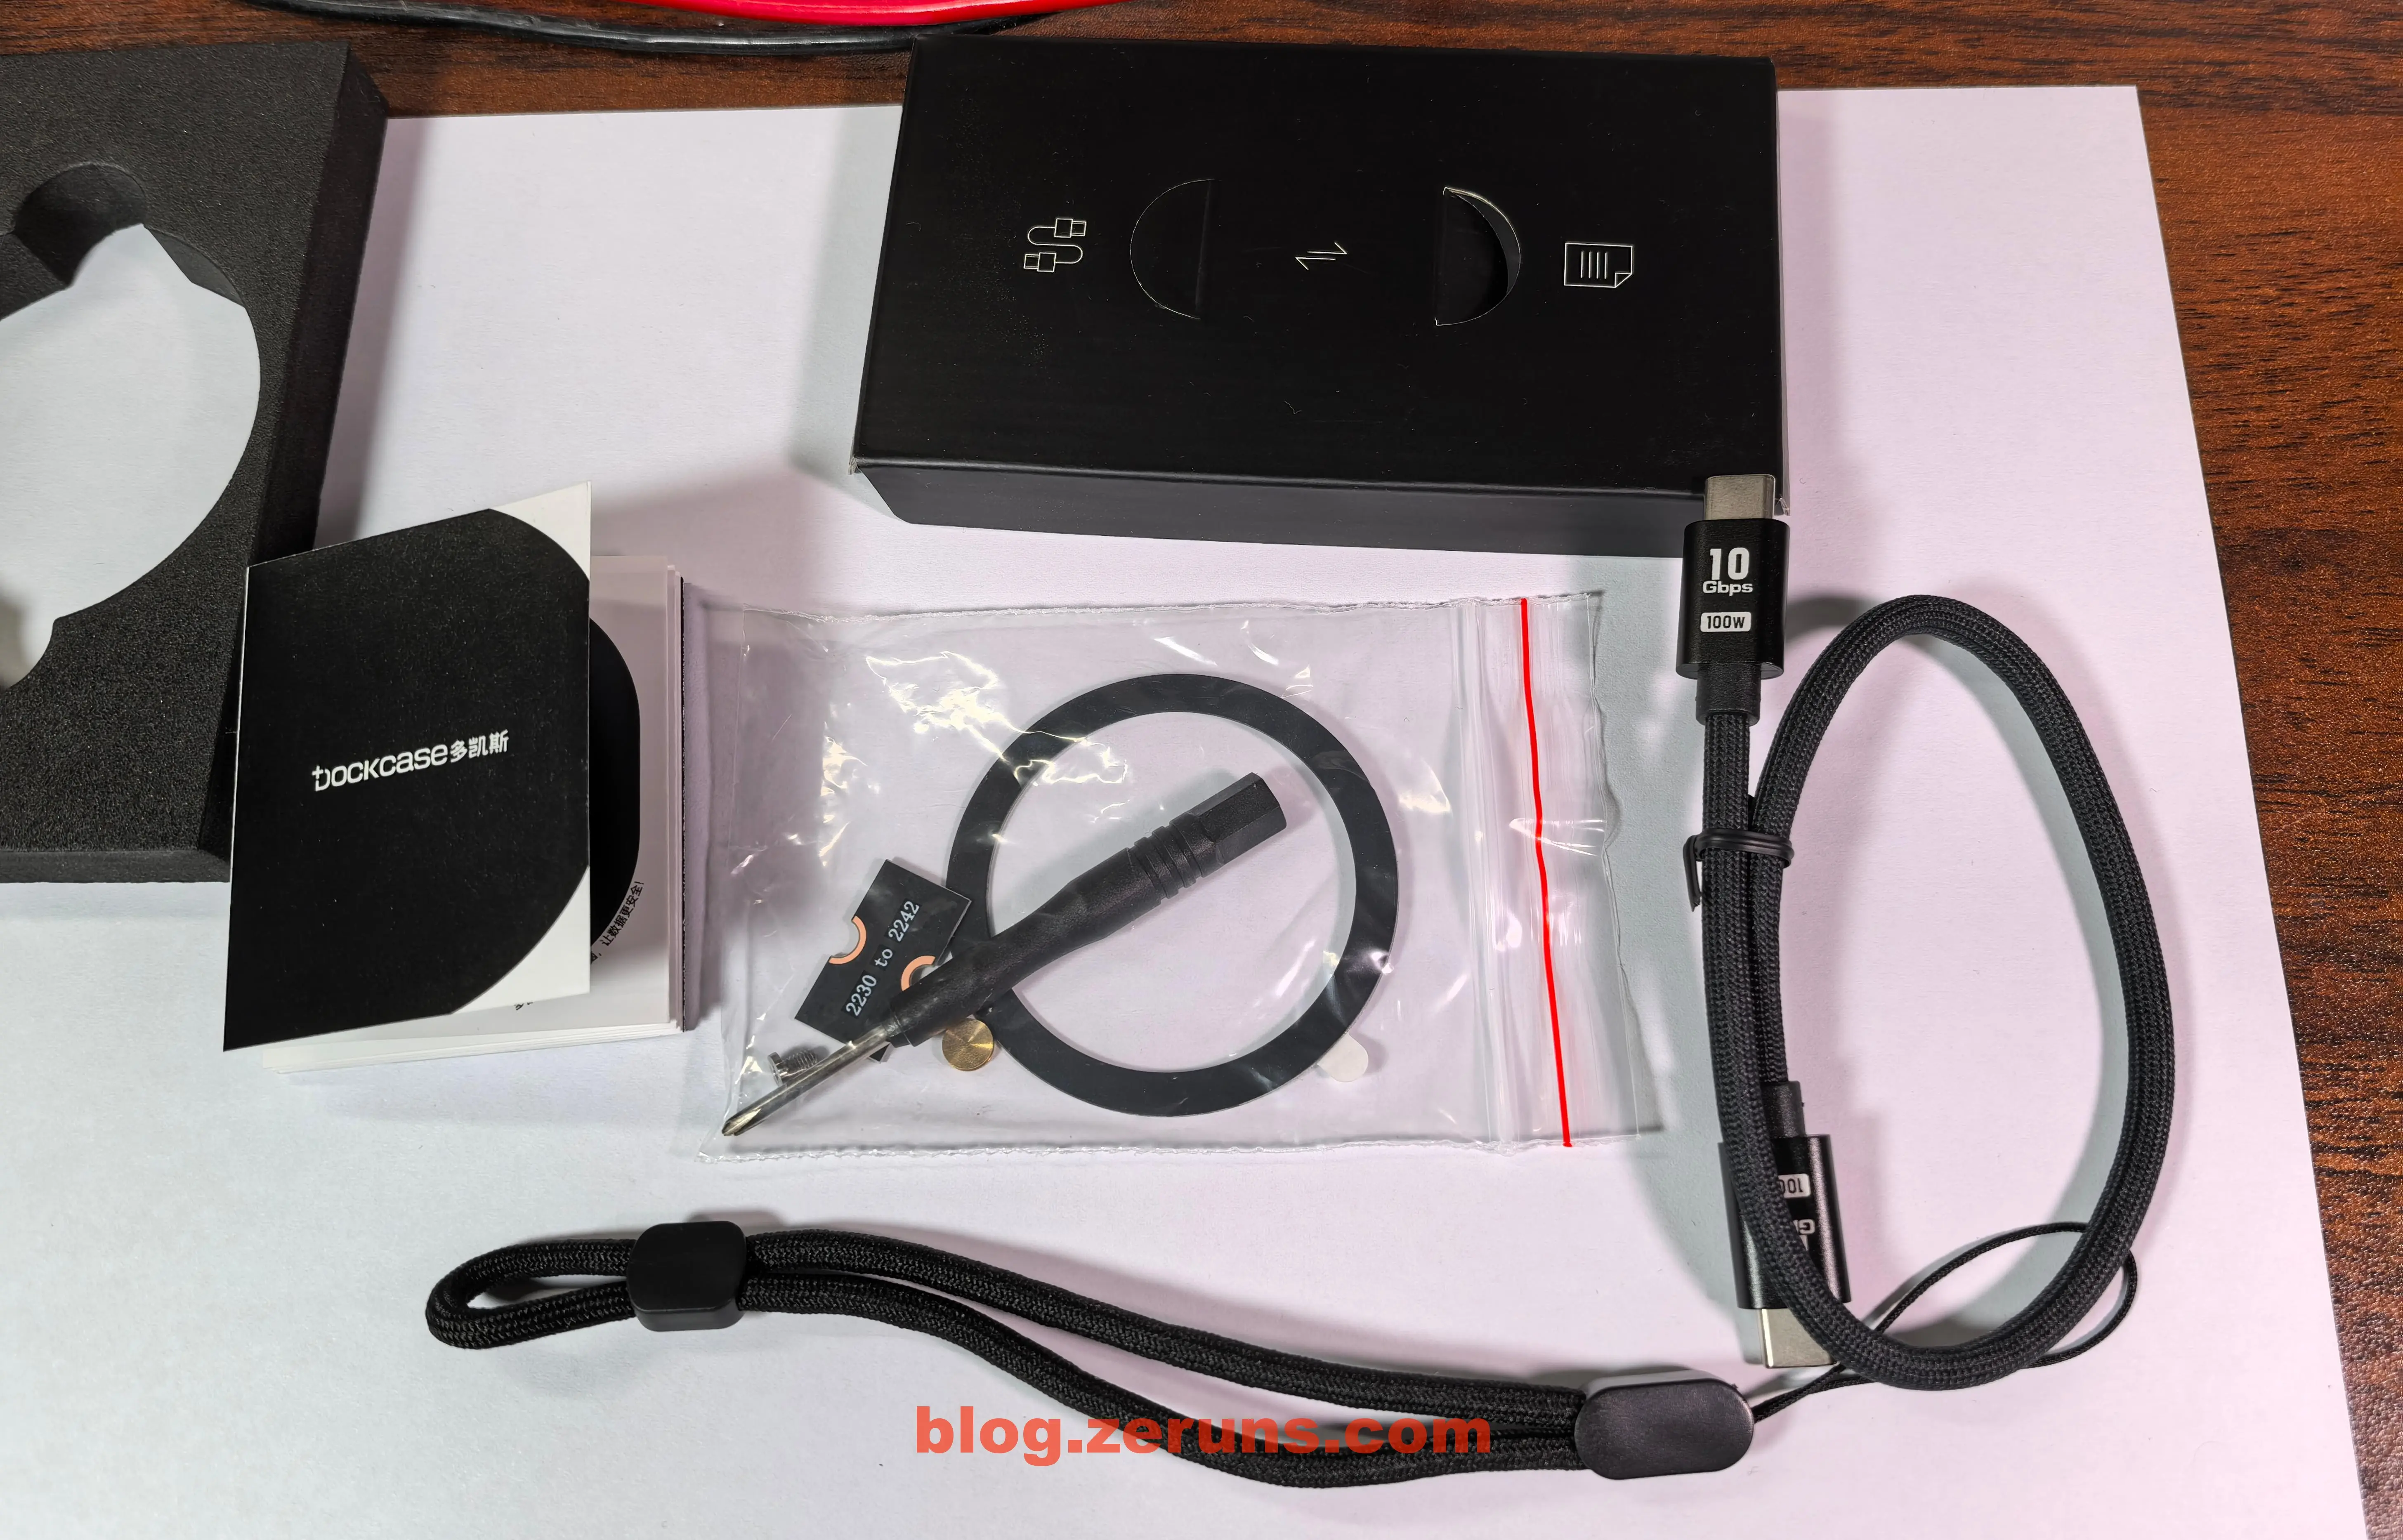
外装箱を開けると、ハードディスクケース、CtoCデータケーブル、ストラップ、取扱説明書、ドライバー、ネジ、SSD延長ボード(2230規格→2242)、磁気誘導リング(磁石付きでないAndroid端末用。このリングを端末背面に貼り付けることで、ハードディスクケースを磁石で固定できる)が入っている。
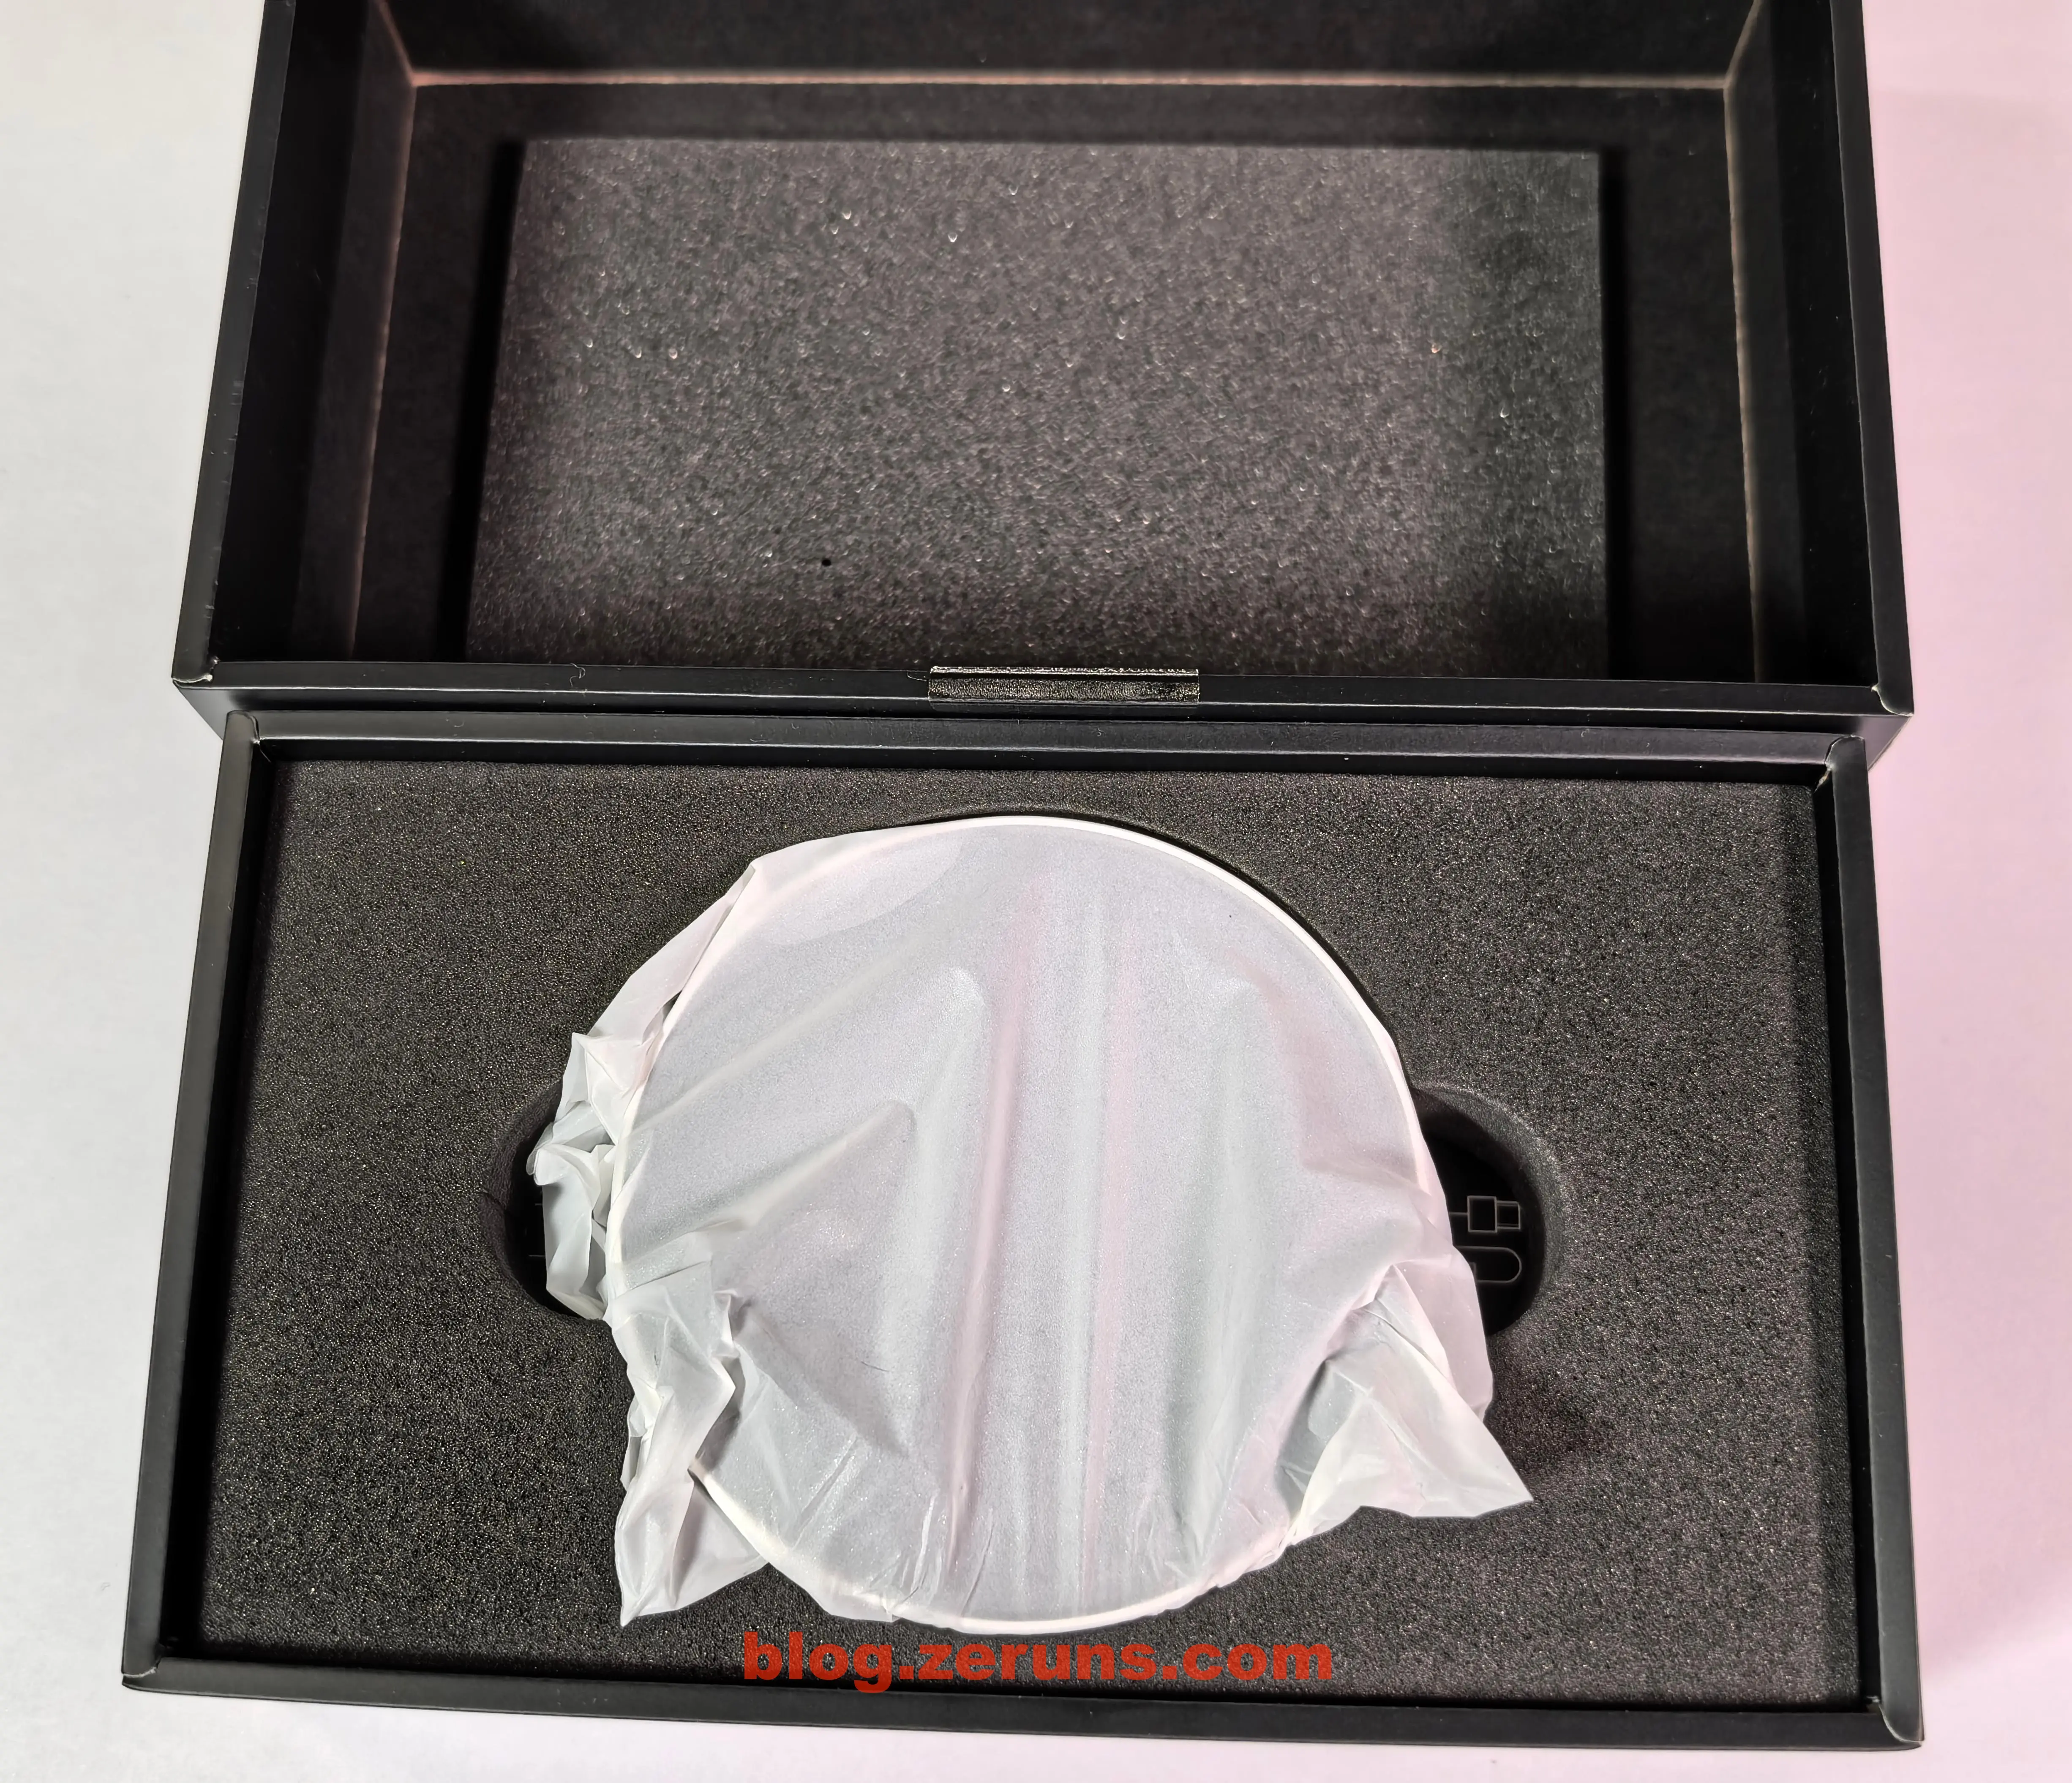
ハードディスクケース表側。画面とガラスカバー、中枠にボタンが1つ、周囲には放熱穴が設けられている。

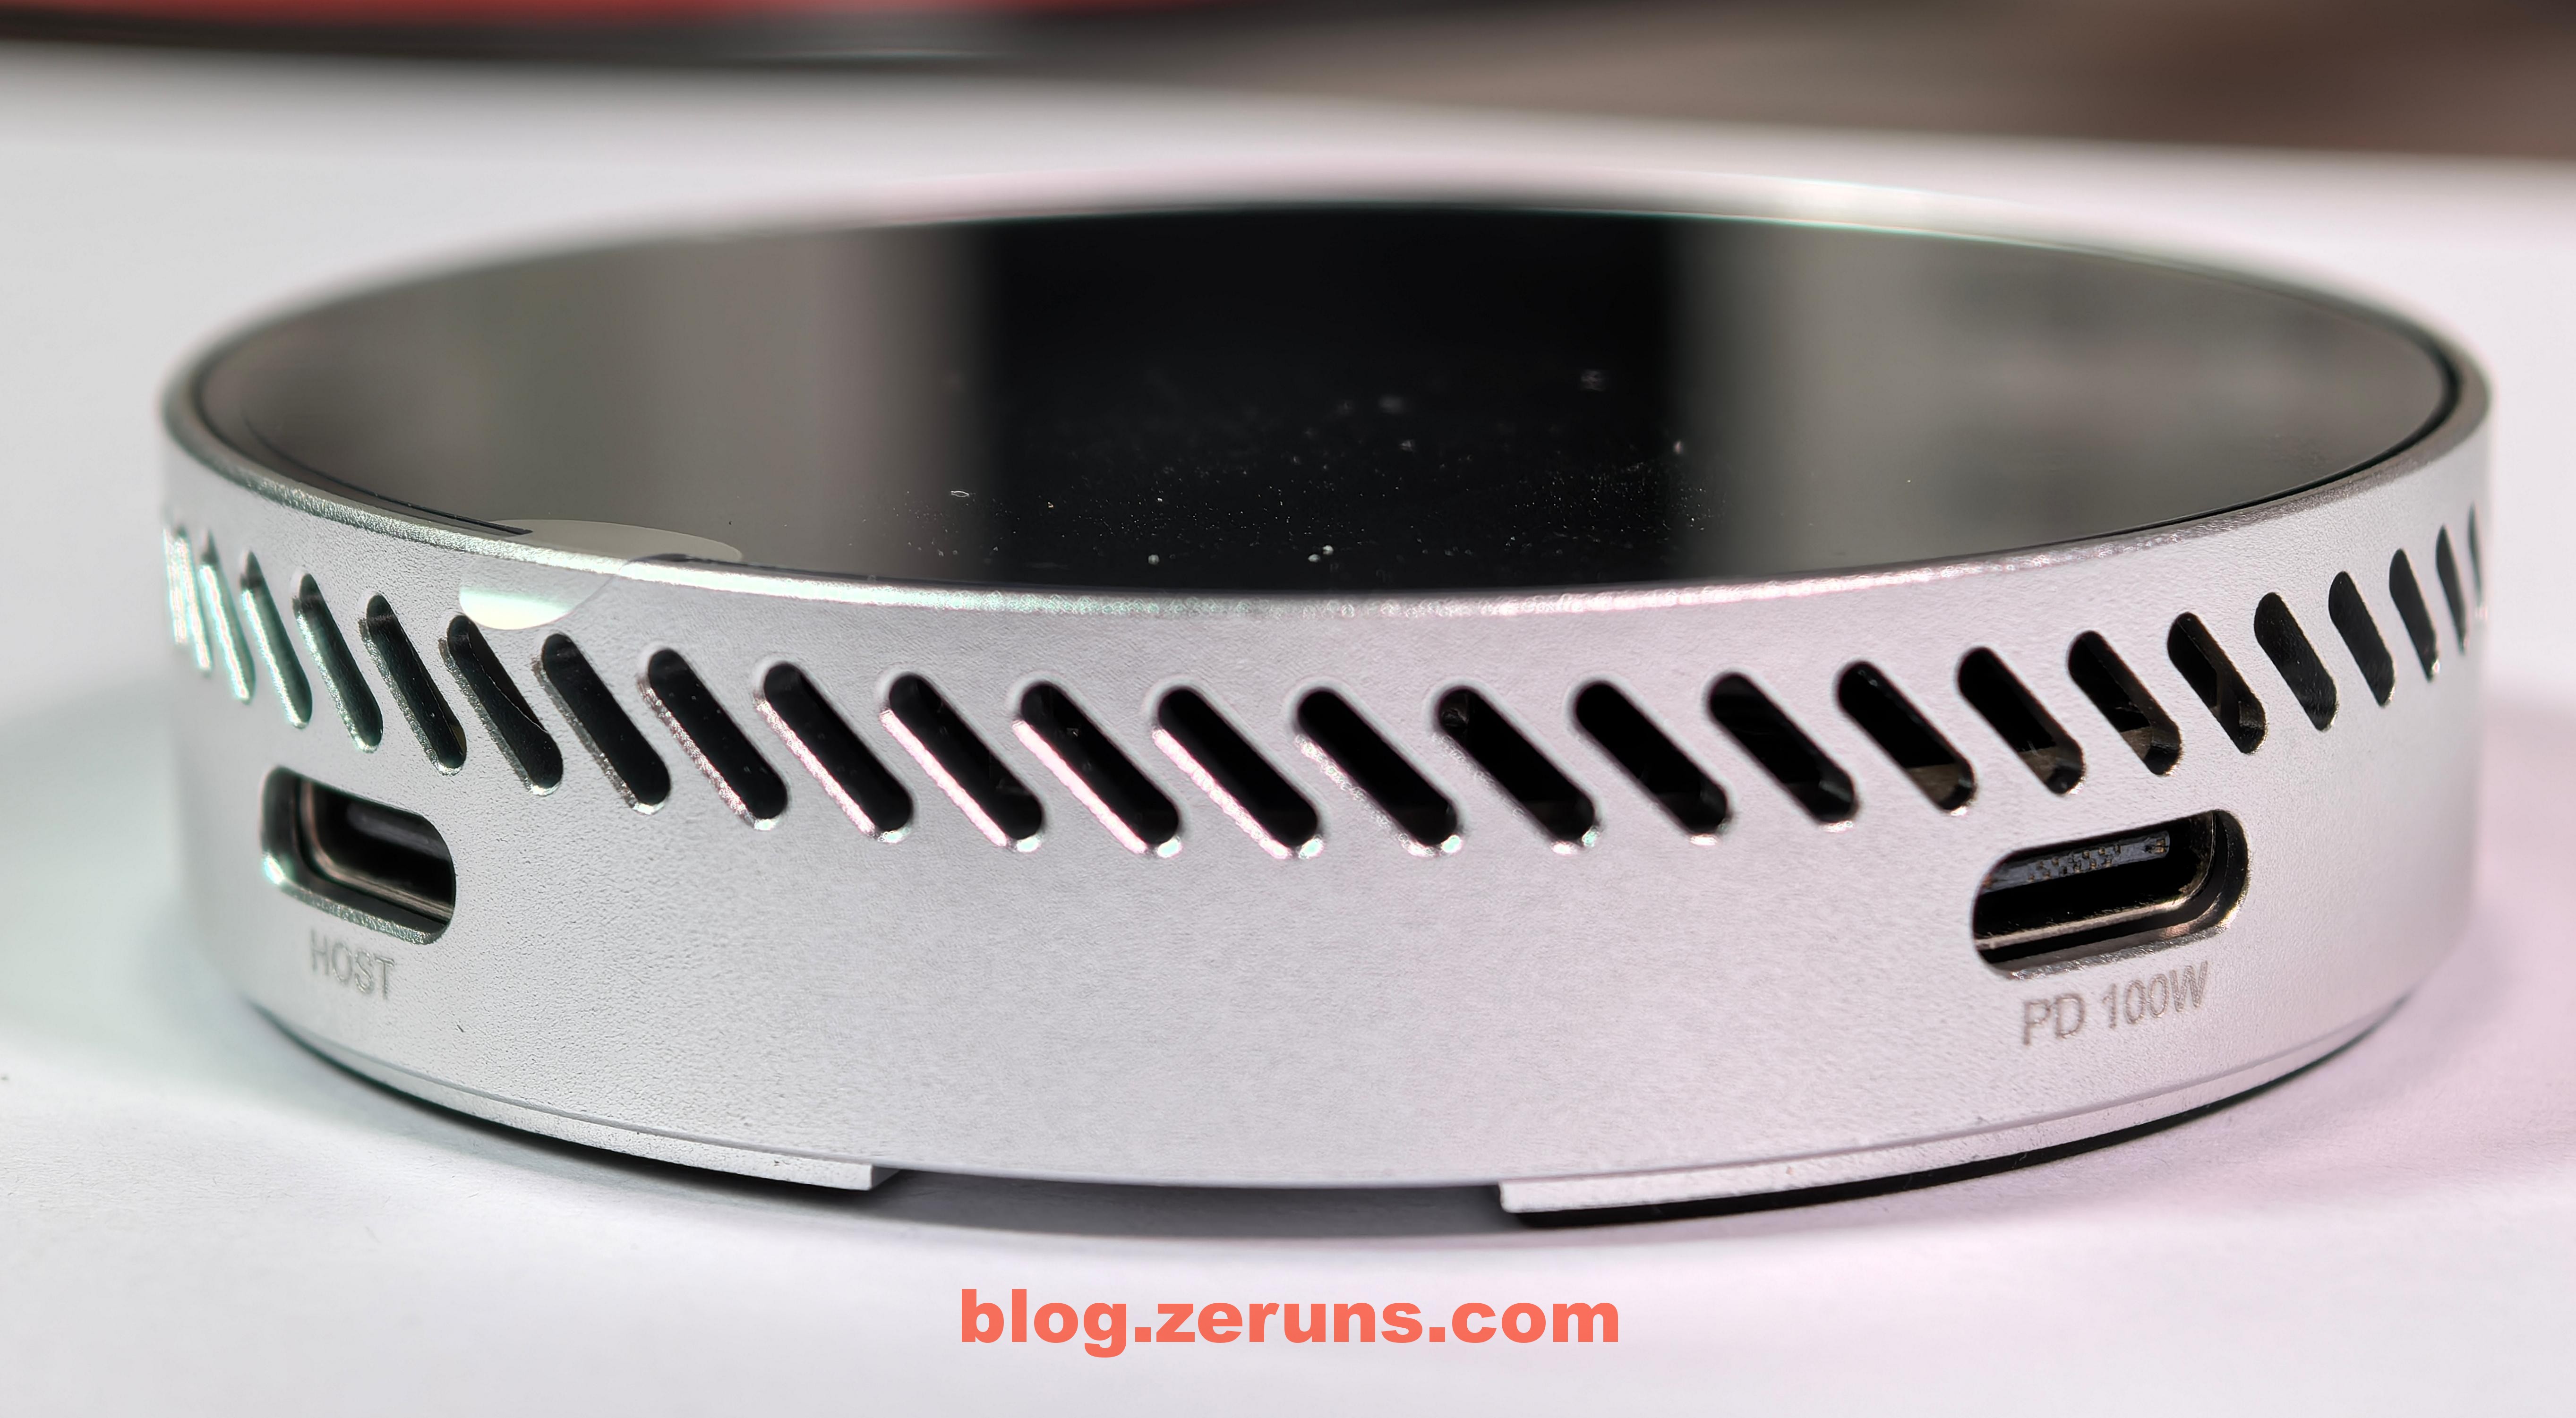
ハードディスクケース側面。中枠にはType-Cポートが2つあり、HOSTはデータ用、PD 100Wは電源供給用である。
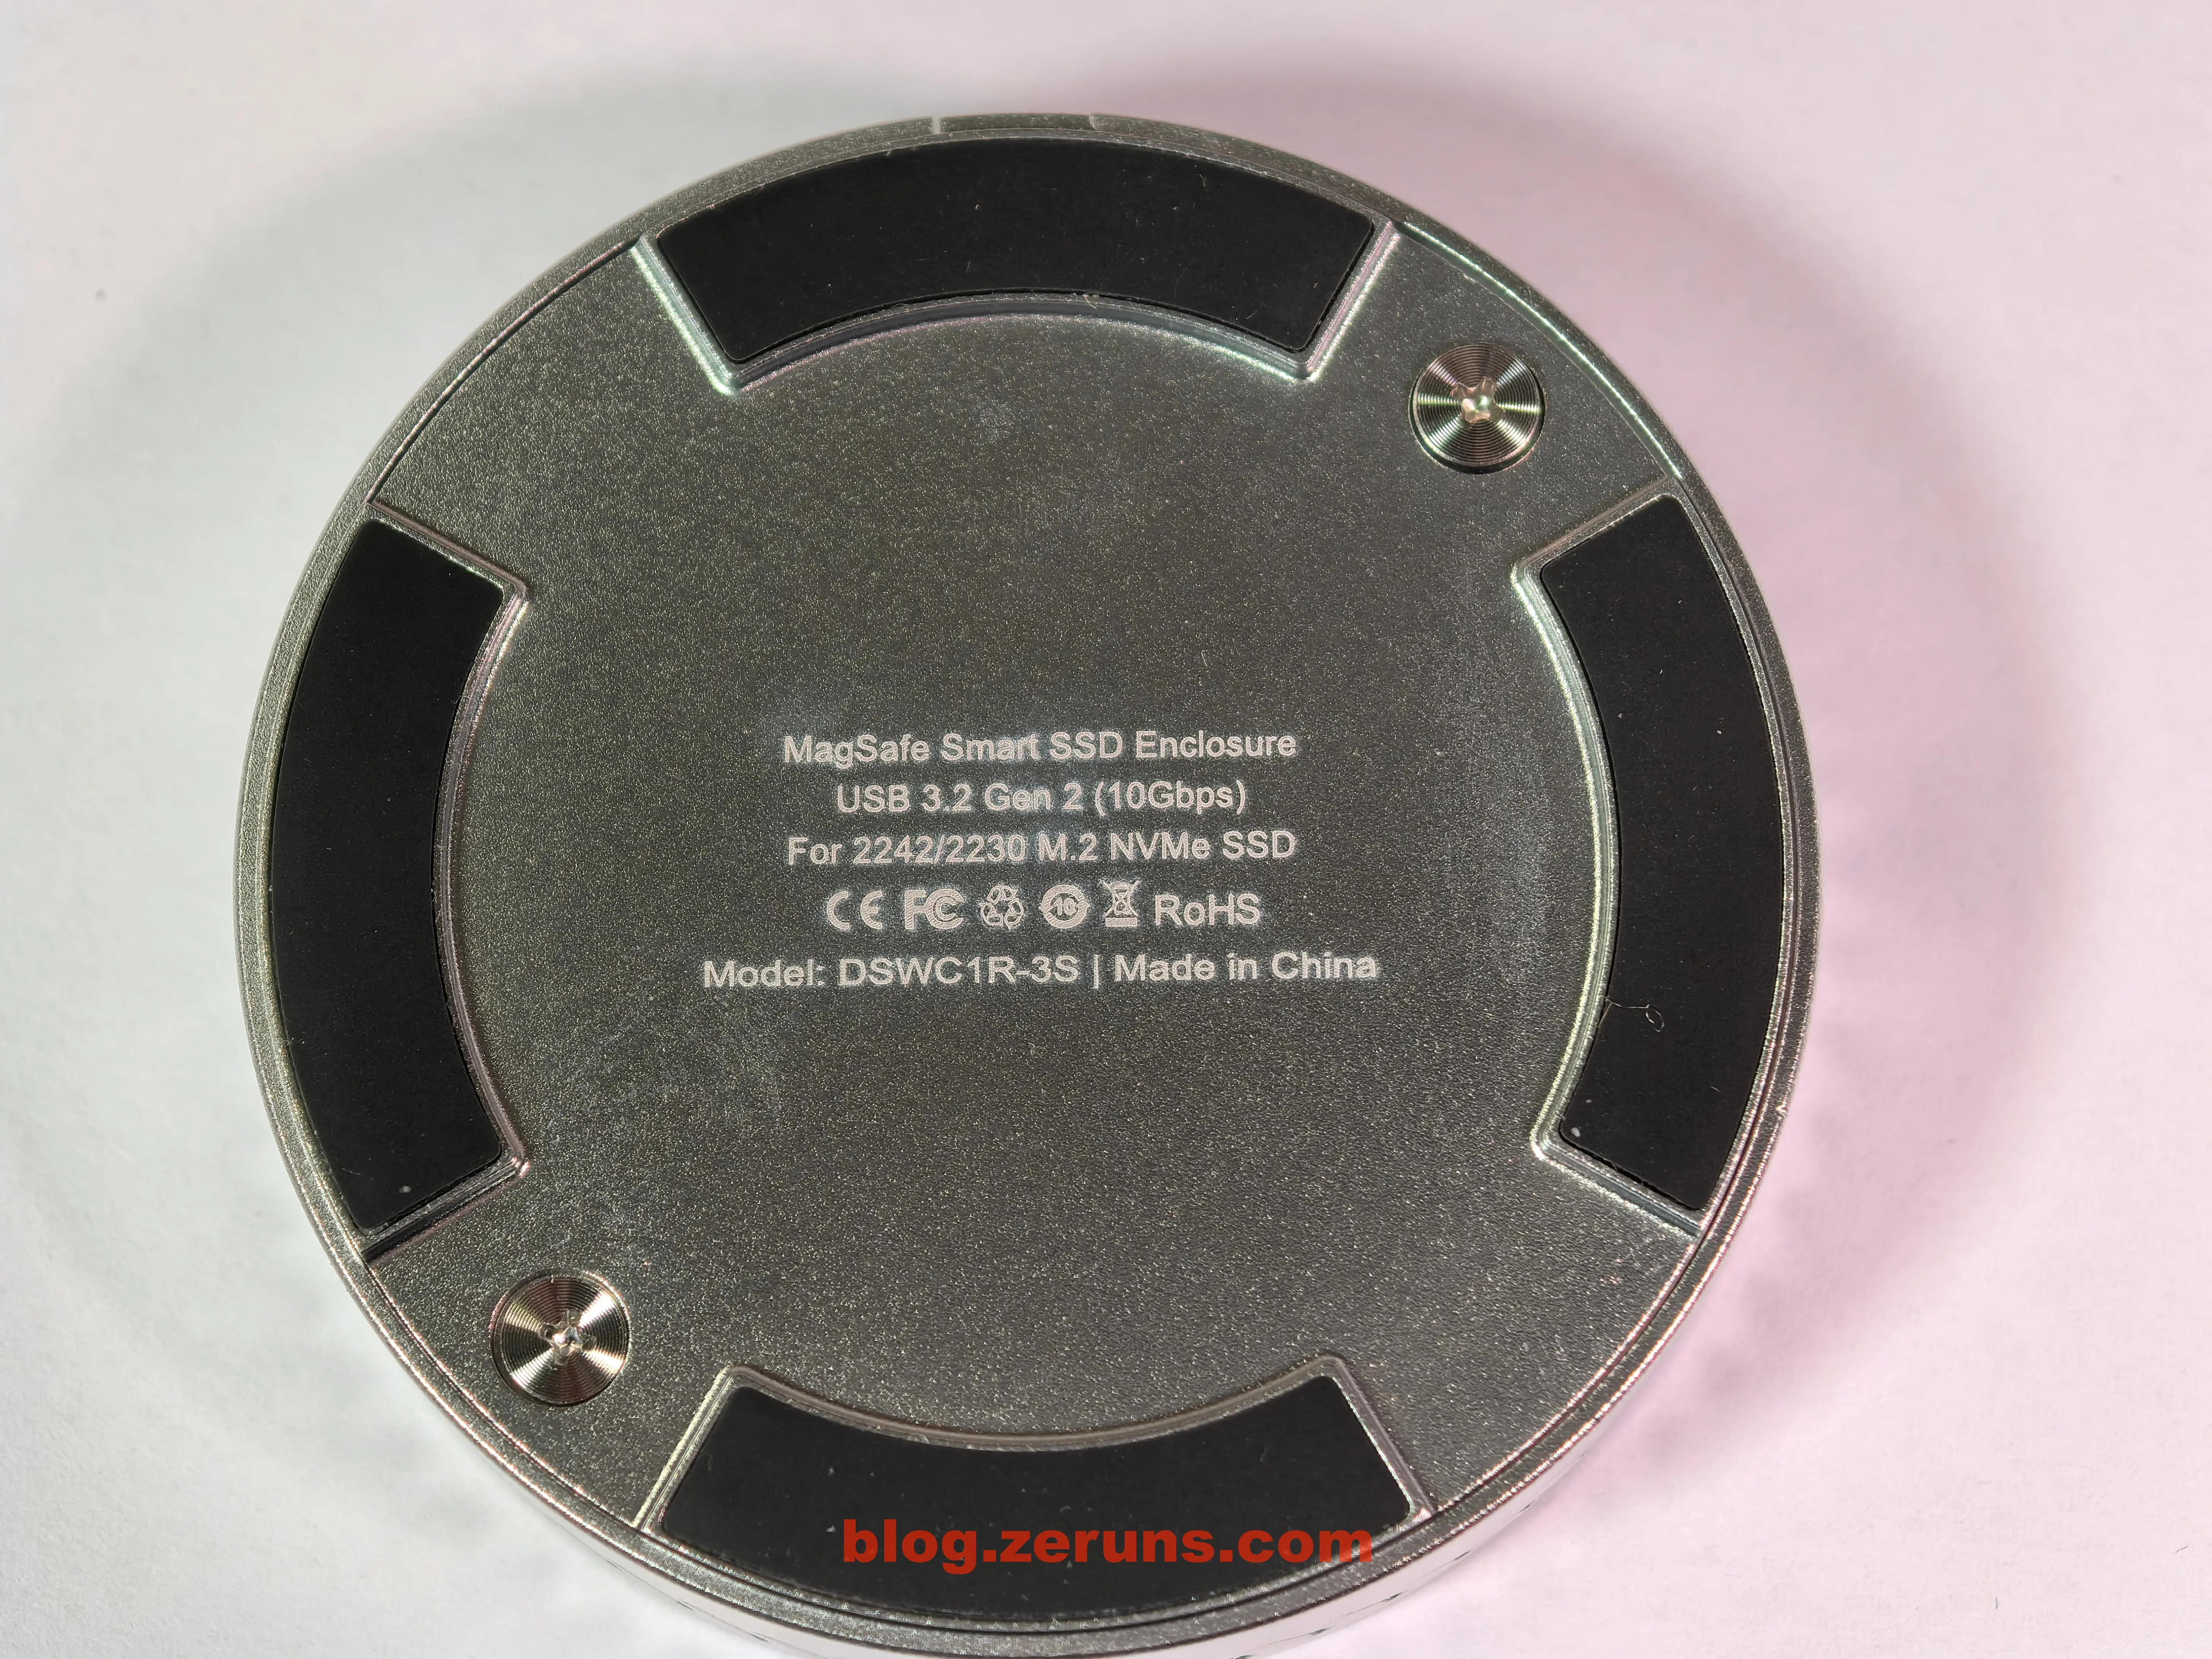
ハードディスクケース底面。型番が印刷されており、滑り止め用の脚ゴム(磁石は脚ゴム内)がある。
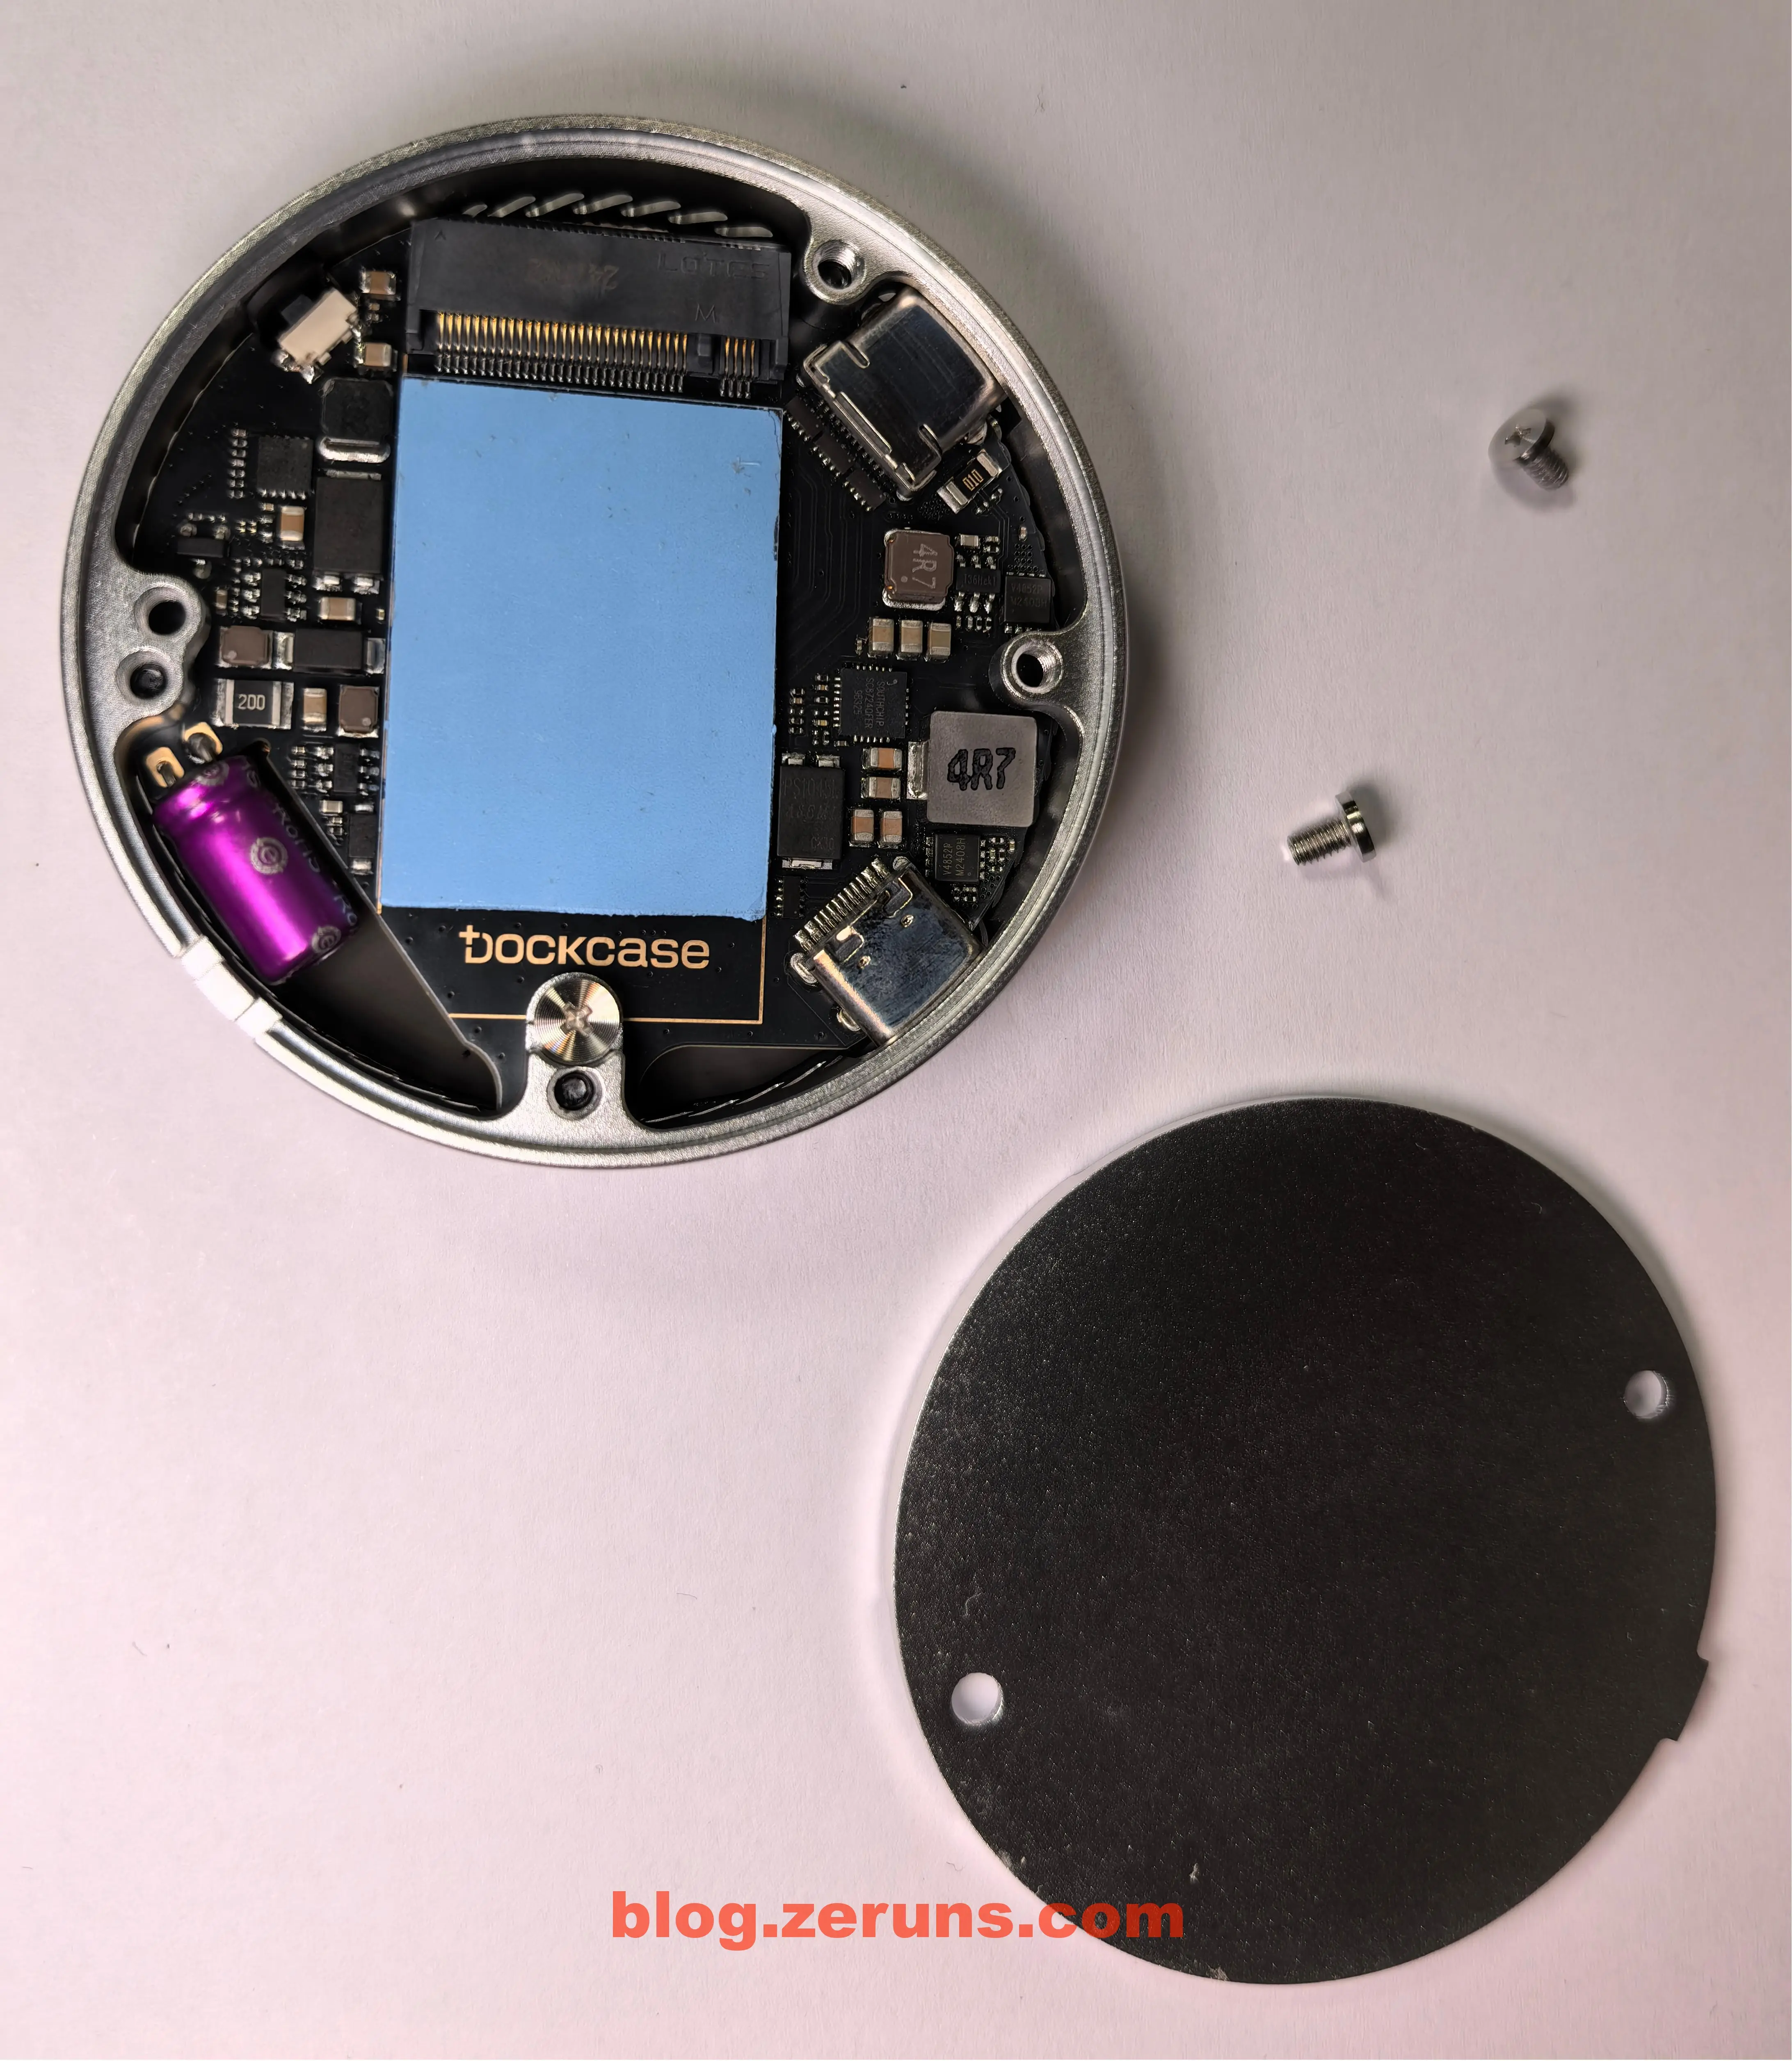
底面の2つのネジを外すと底カバーが外れ、M.2 SSDを取り付けられる。基板上には導熱パッドがあり、その上にはプラスチックフィルムが貼られているため、使用前に剥がす必要がある。
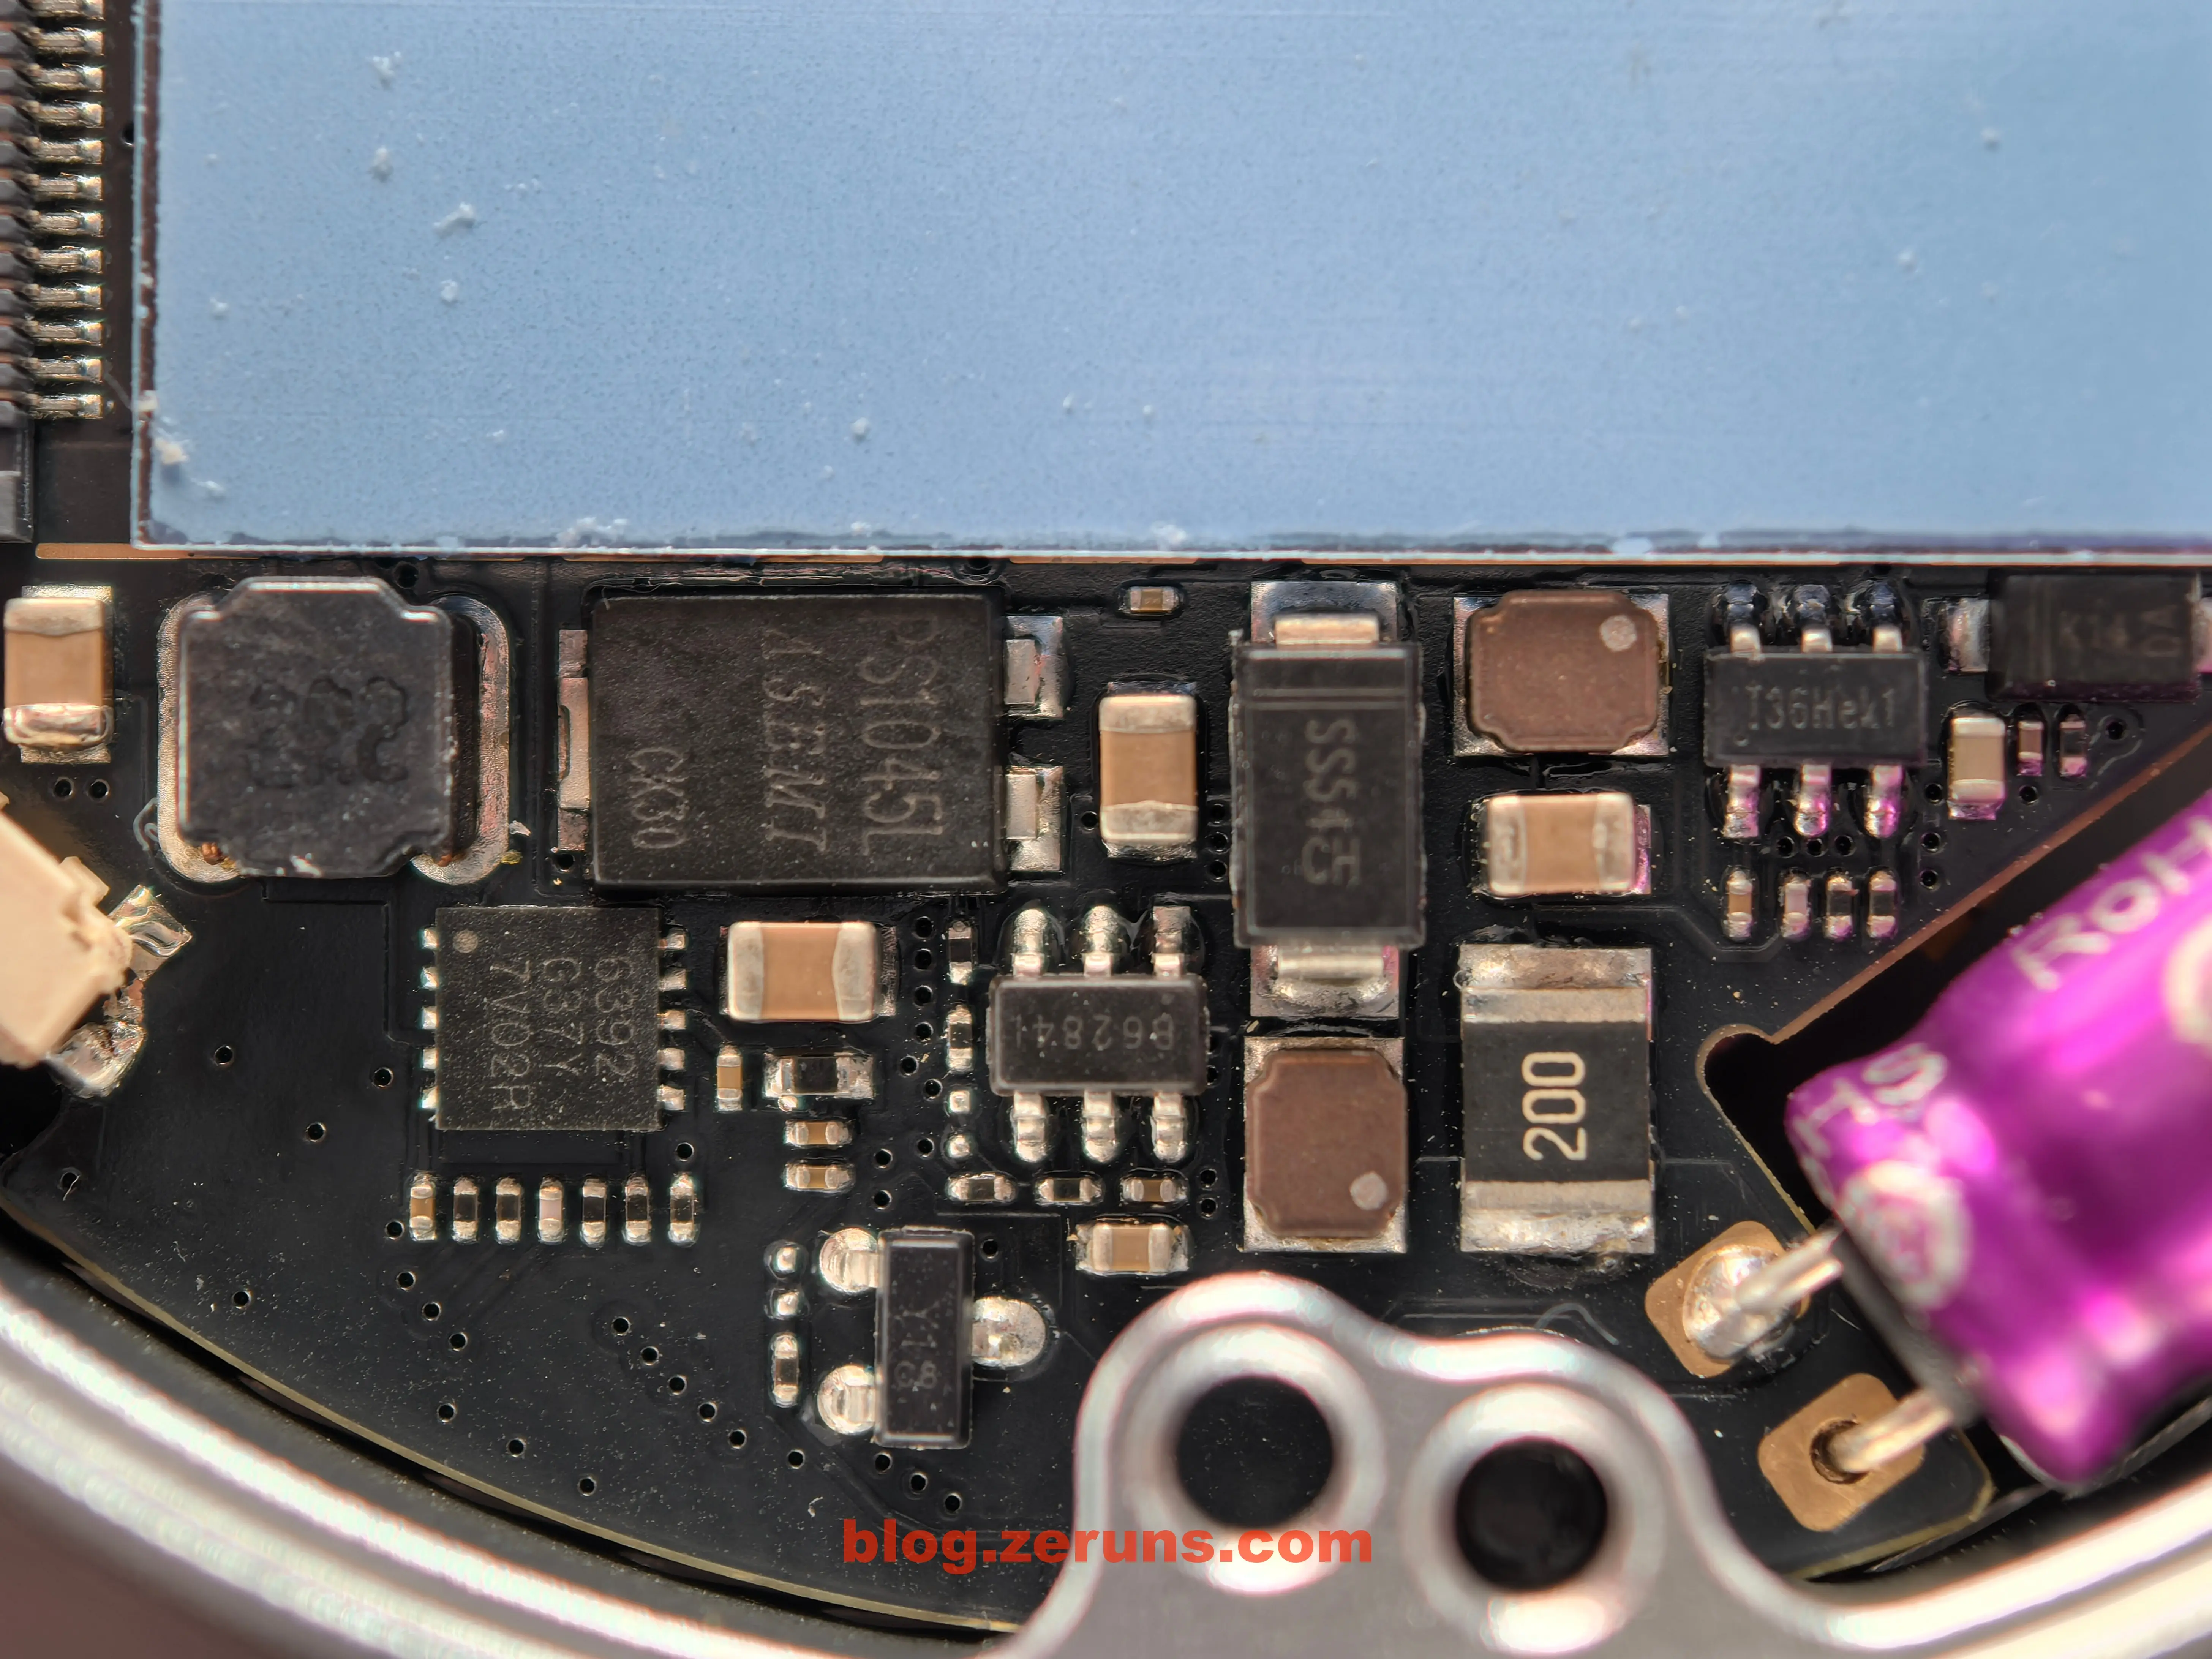
下図のチップ:
- V4852P M2408H:PMOSトランジスタ。型番JMV4852P、30V/32A
- SC8724QFER:南芯(Southchip)社製の高効率同期式昇降圧コンバータ。4つのMOSFETを内蔵。入力2.7-22V、出力3-22Vに対応。固定5.1V出力可能、最大出力電流3.5A
- PS1045L:ASEMI製超低順方向電圧降下ショットキーダイオード。TO-277パッケージ。順方向電流10A、逆耐圧45V
- SS54:表面実装型ショットキーダイオード。最大逆耐圧40V、順方向電流5A。低順方向電圧降下(約0.55V)と高速スイッチング特性を持つ
- 6392 G37Y 7V02R:情報なし
- 36Hek1:情報なし。おそらくDCDC電源チップ
また、停電保護用の大容量コンデンサがあり、データ転送中のファイル破損を防ぎ、FTLマッピングテーブルを完全に保存するための時間を確保する。
主コントローラチップとディスプレイ関連チップは基板裏面にあり、ガラスパネルを剥がす必要があるが、接着が強いため、ここでは分解しない。
メーカー公表の仕様によると、主コントローラチップは瑞昱(Realtek)のRTL9210。フロントエンドインターフェースはUSB 3.1 Gen2(10Gbps)、Gen1(5Gbps)およびUSB 2.0に互換。バックエンドインターフェースはPCIe 3.0 x2(帯域幅16Gbps)。
RTL9210Bチップ公式サイト:https://url.zeruns.com/Sc7nr

評価&速度テスト
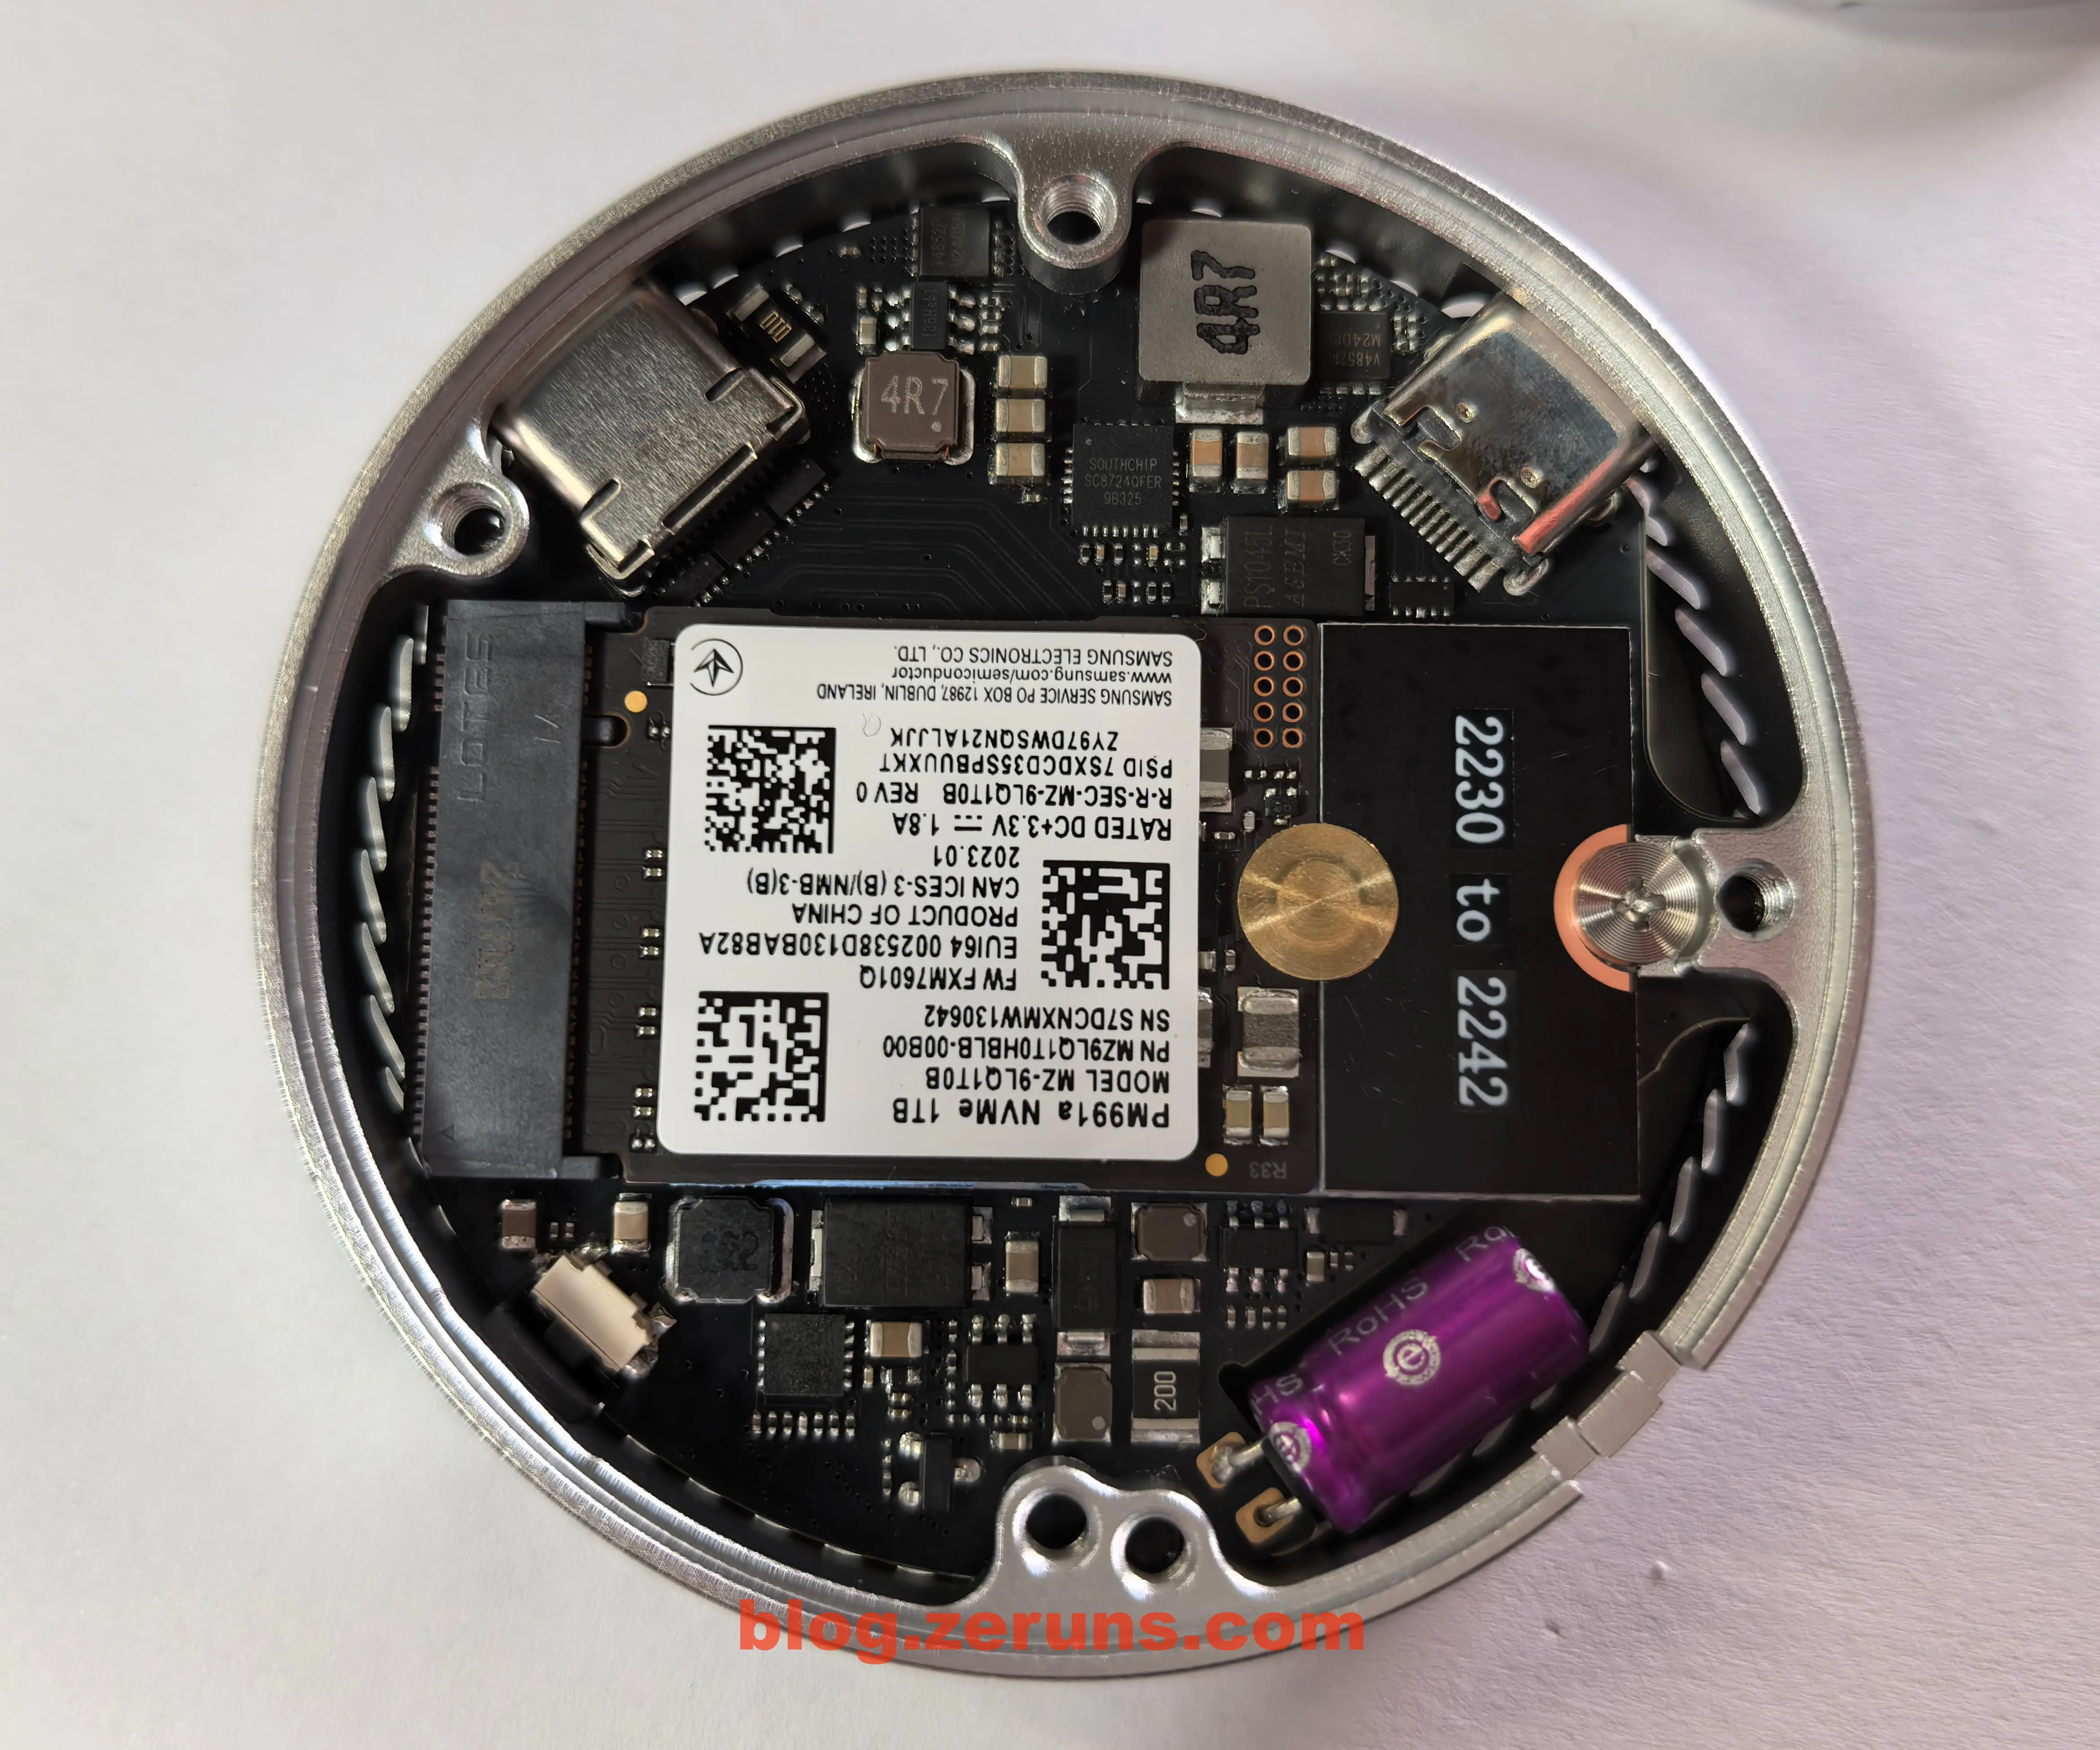
テスト用にSamsung PM991a 1TB SSDを装着。規格は2230のため、延長ボードで2242に変換して使用。
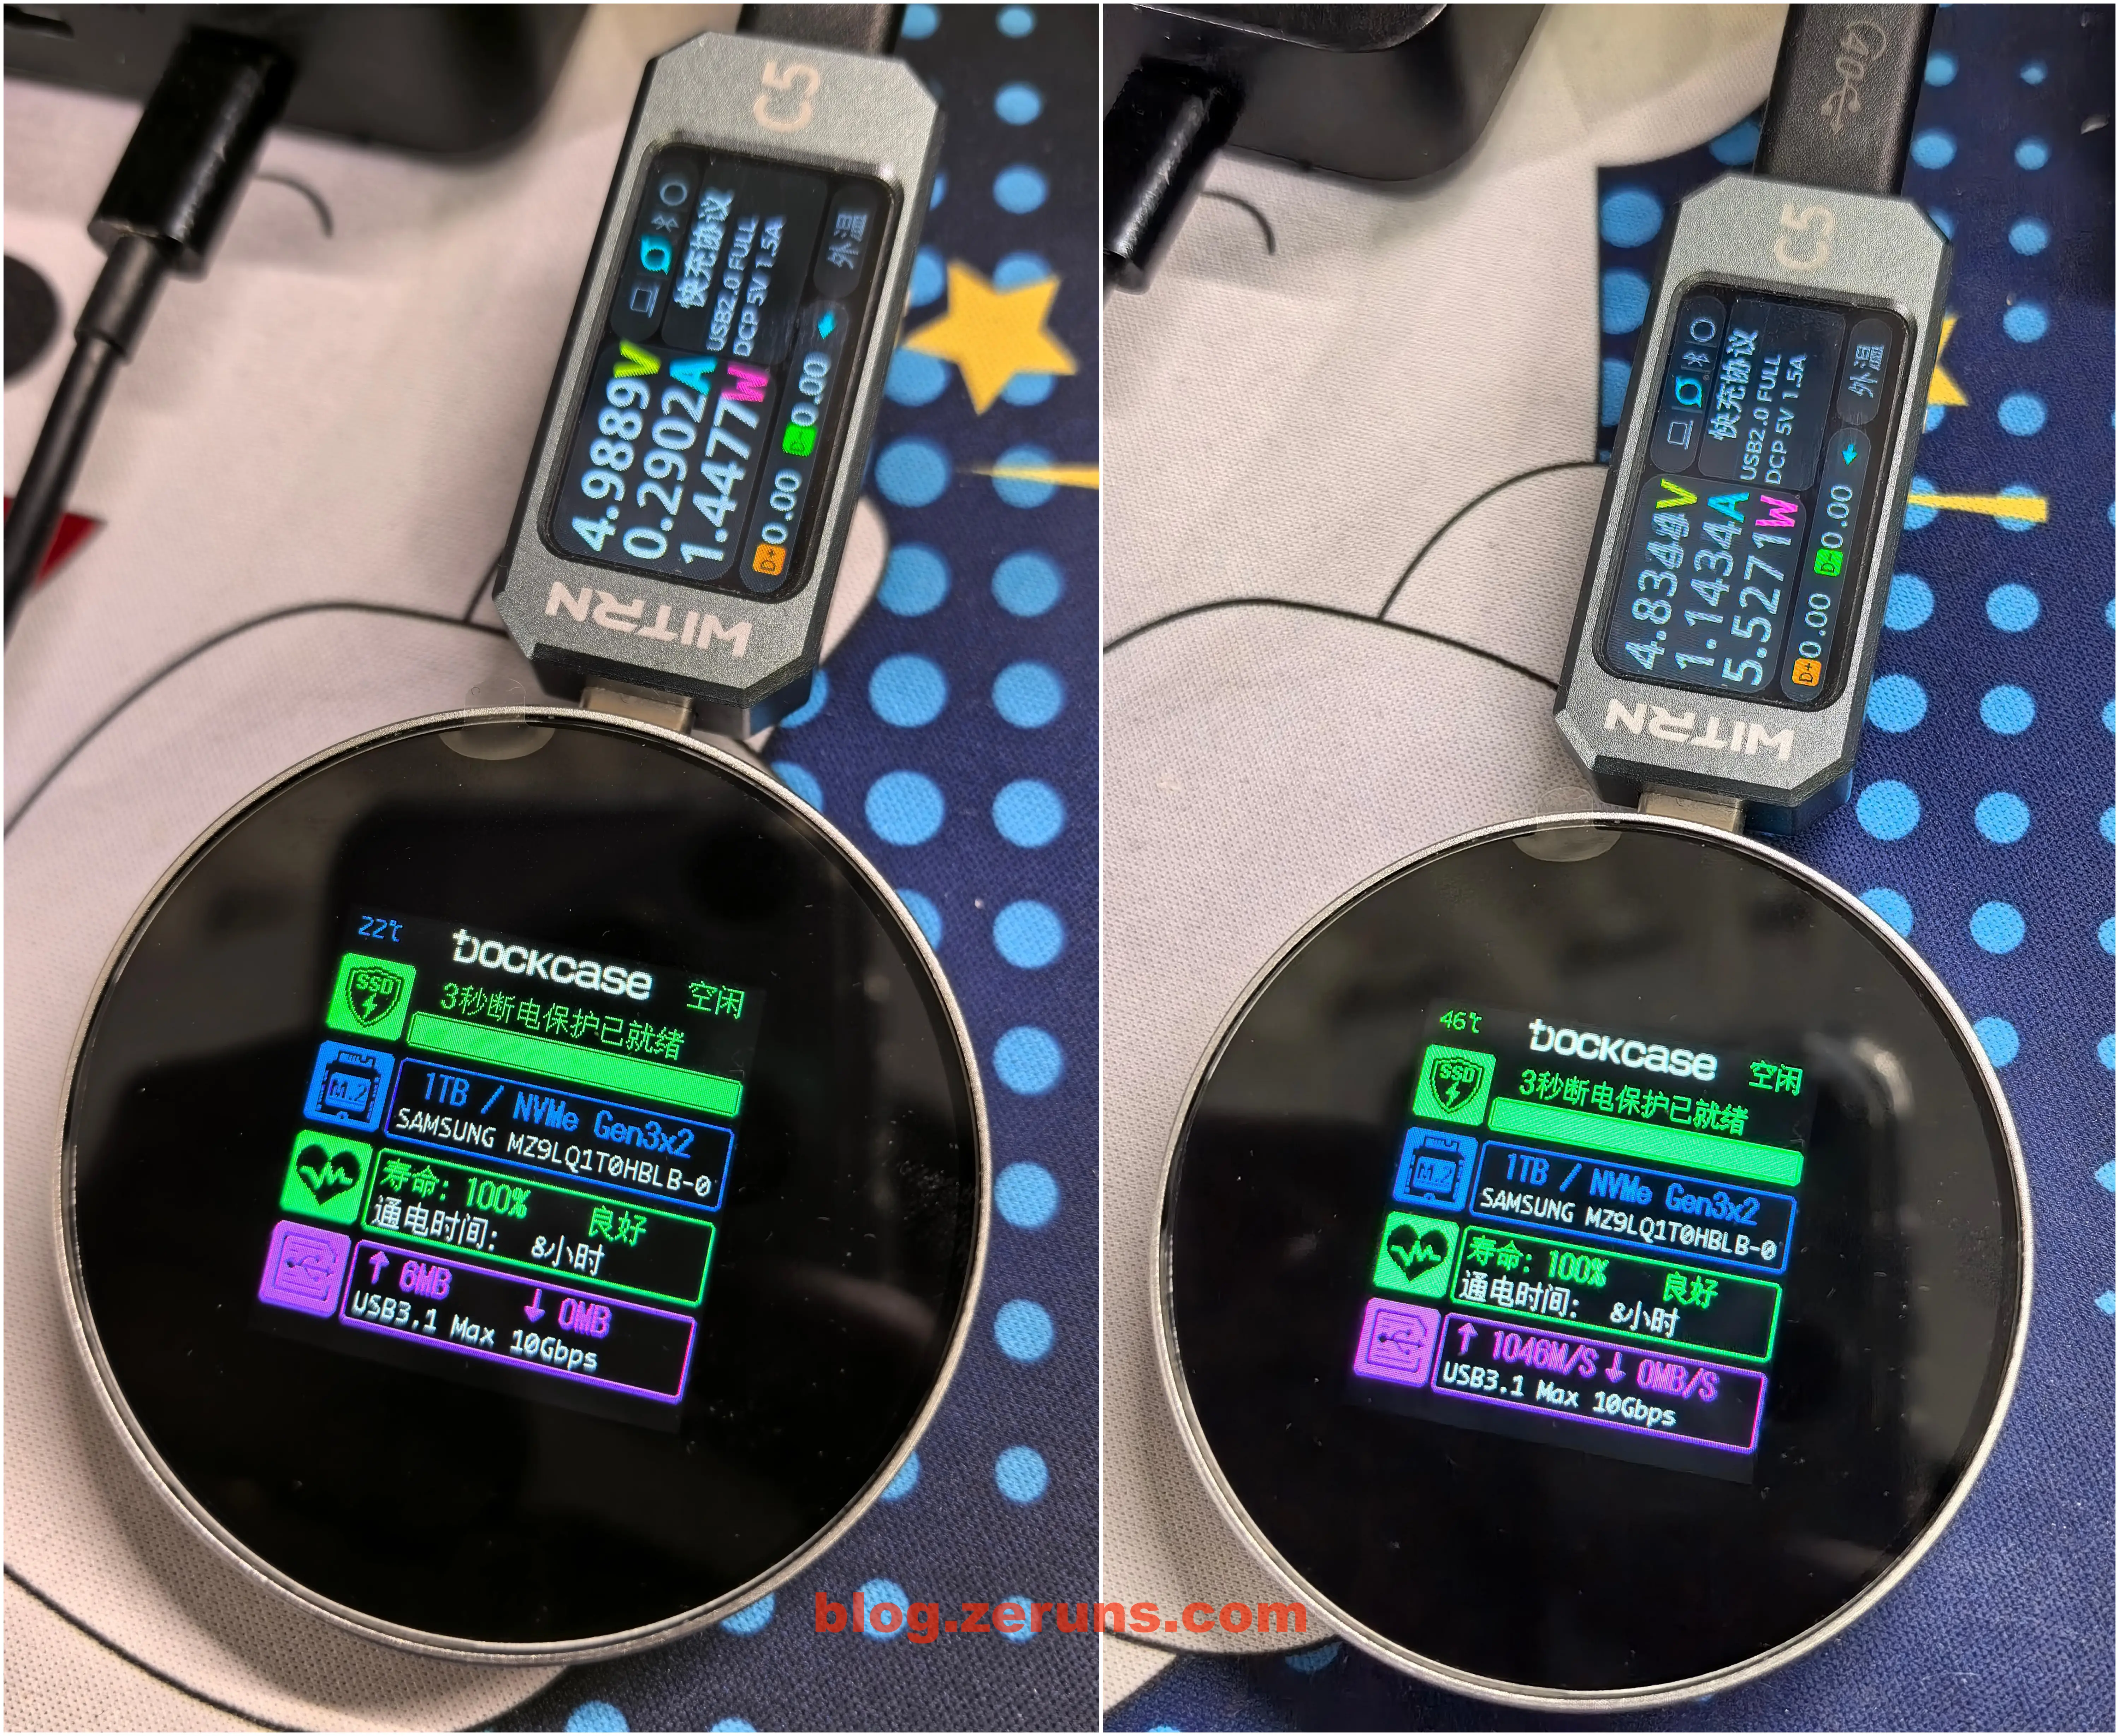
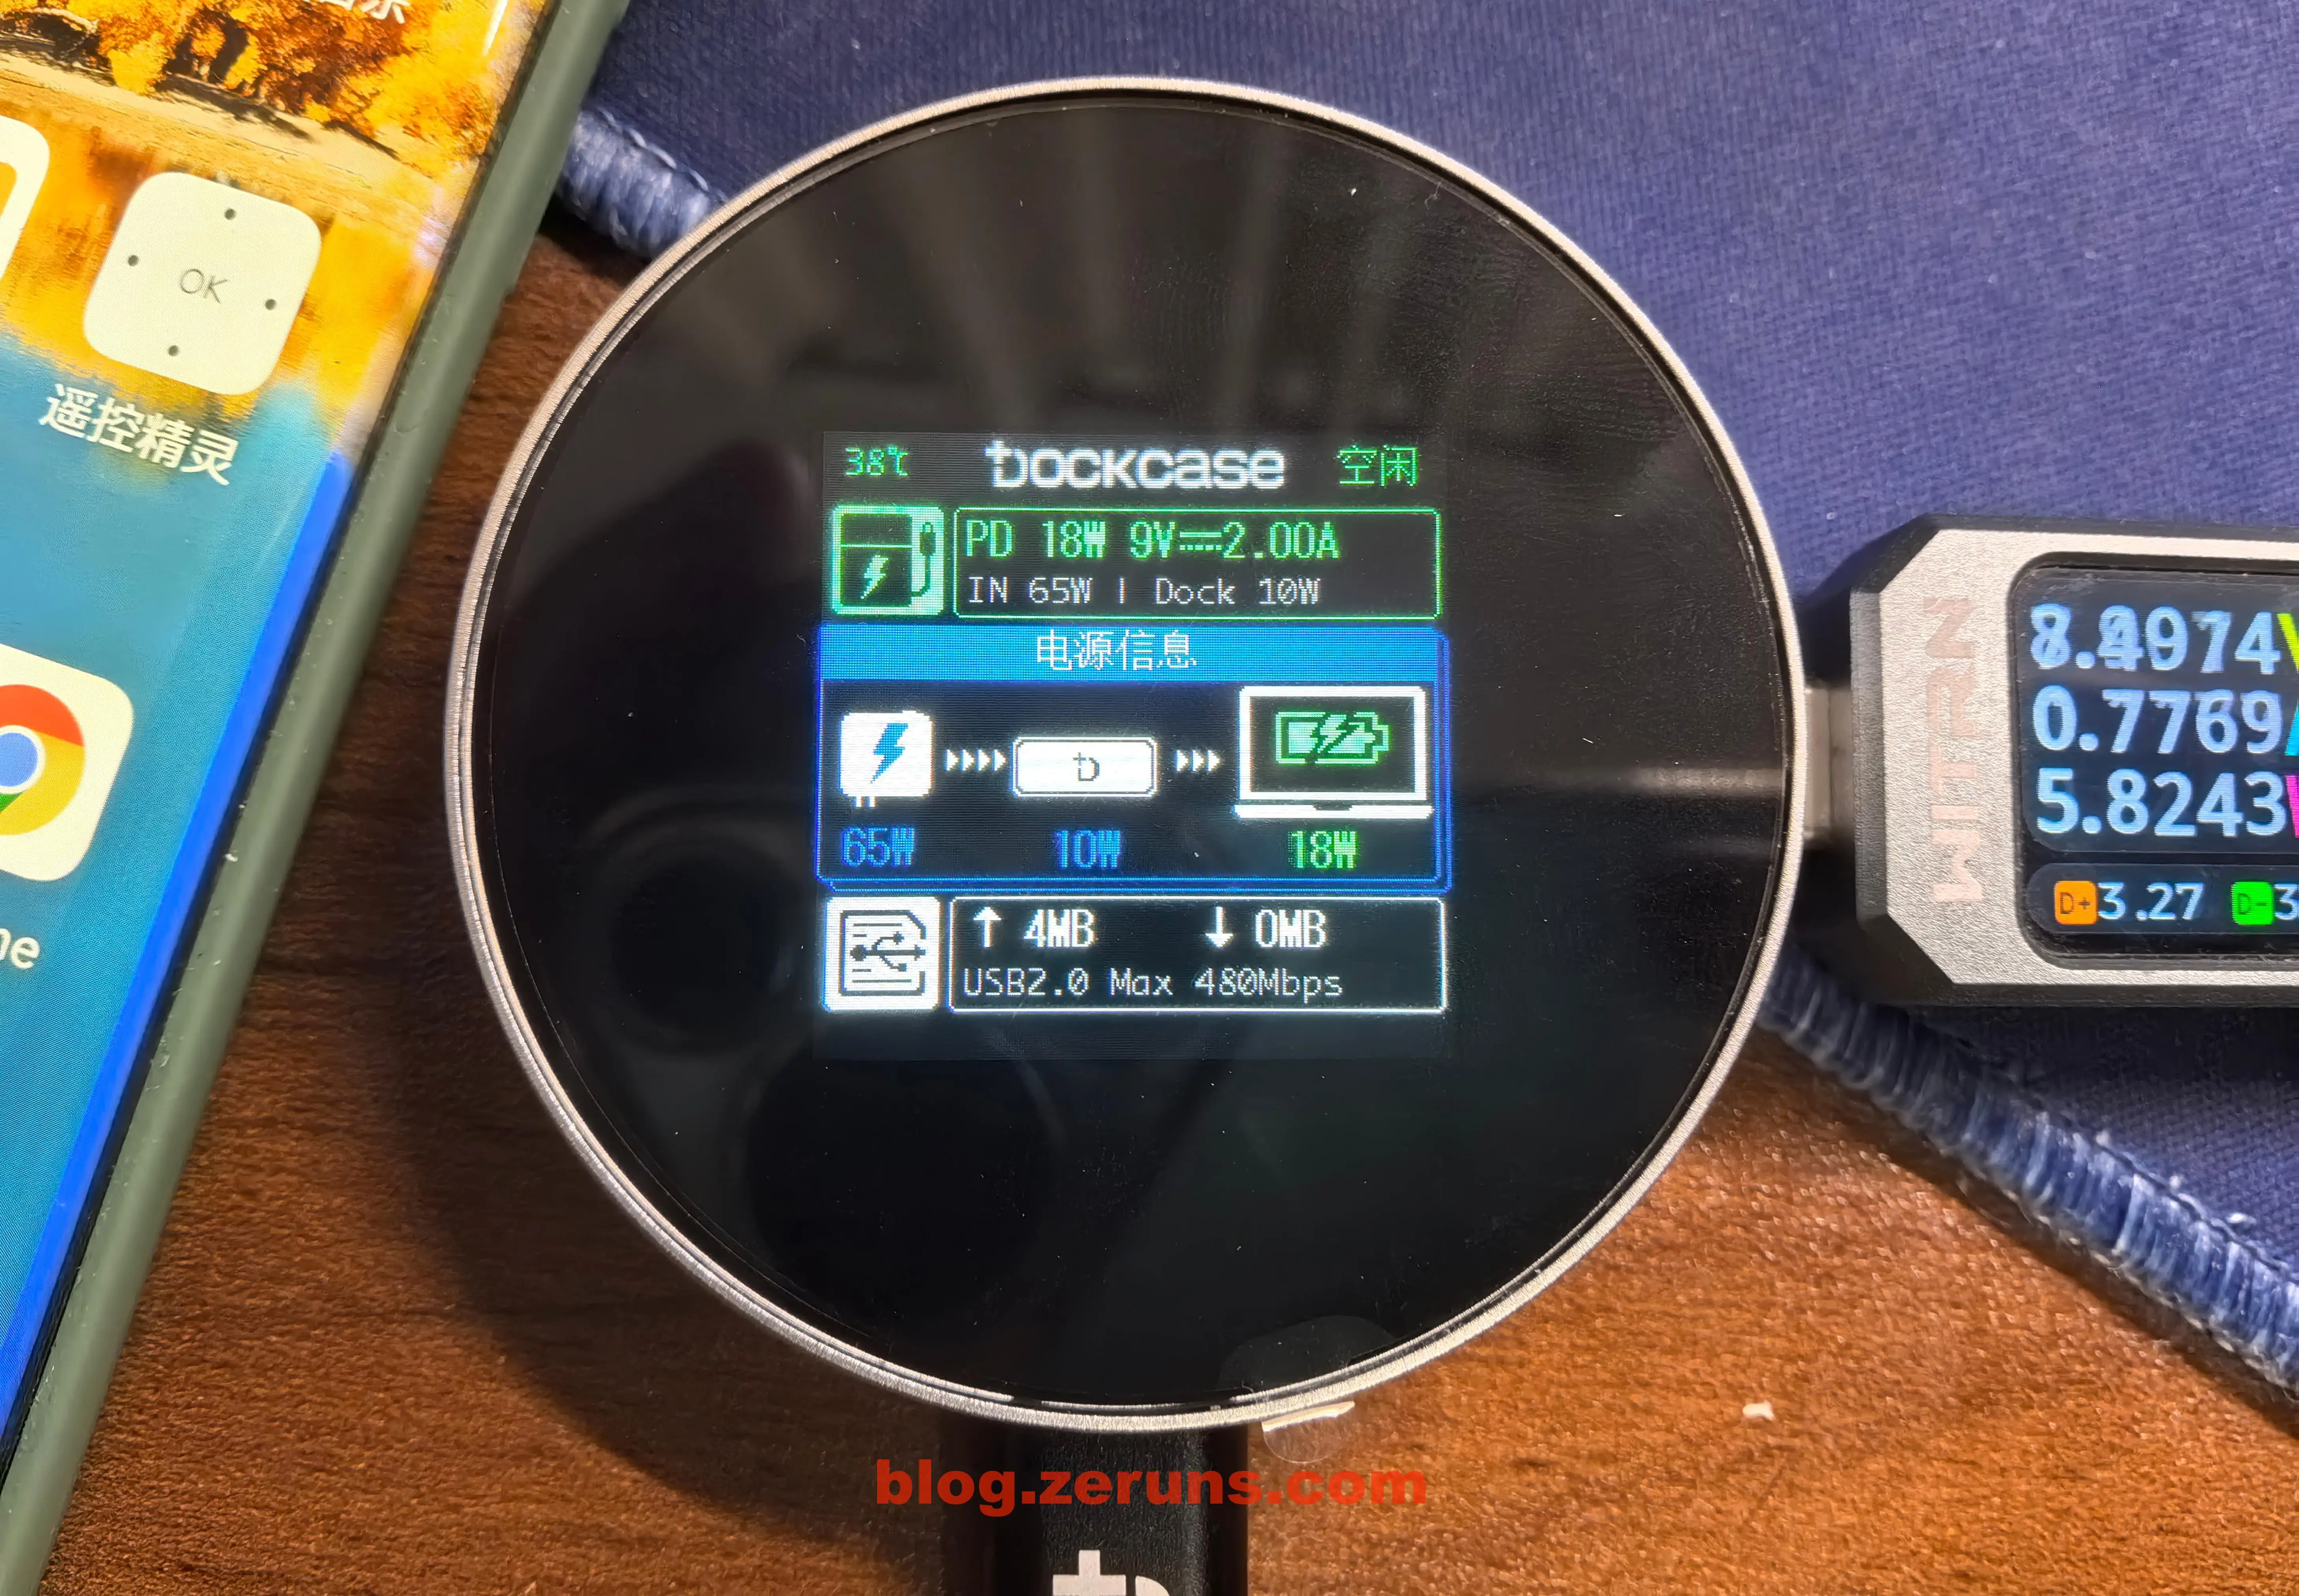
PCに接続し、読み書きなしの状態ではハードディスクケースの消費電力は約1.4W。ケースの画面には、SSD温度、型番、容量、寿命、通電時間、リアルタイム読み書き速度、USB接続プロトコル速度が表示される。
読み取り速度が最大時、動作消費電力は約5.5W。
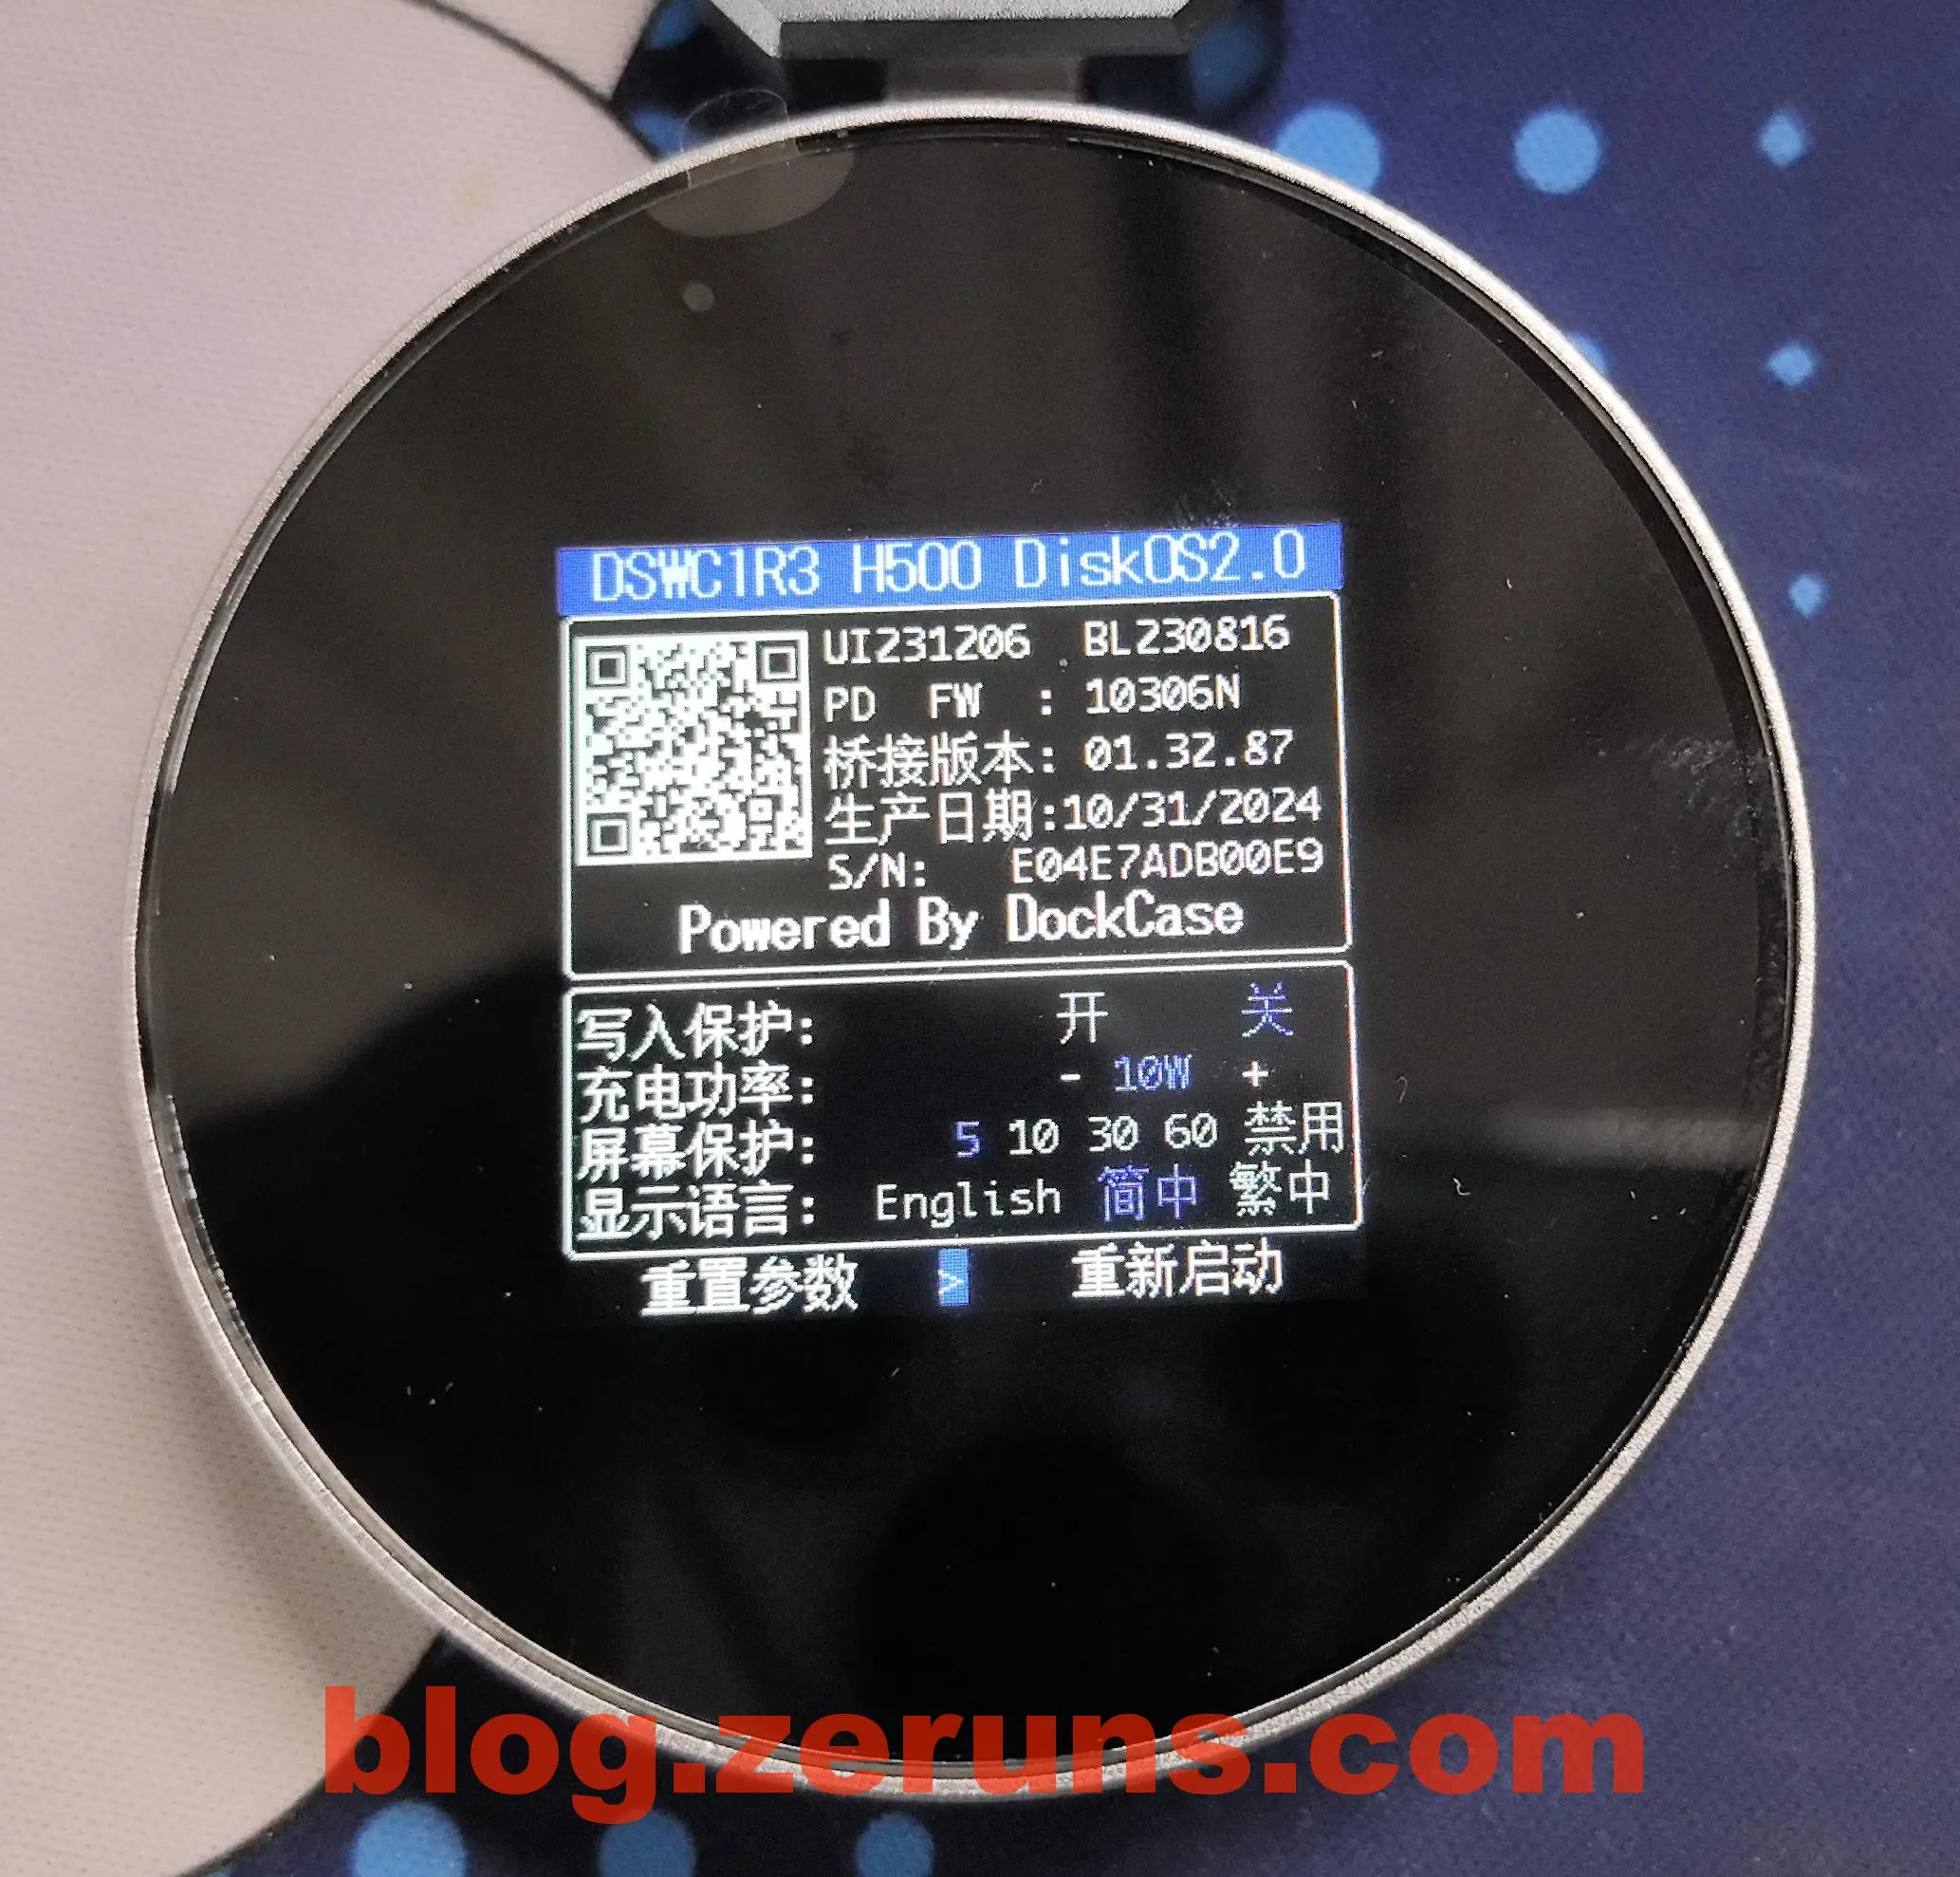
中枠のボタンを長押しし、「About」が表示されたら離すと、設定画面に入れる。書き込み保護の有効化、スクリーンセーバー時間、充電パワー(停電保護用コンデンサの充電パワー)、表示言語の設定が可能。
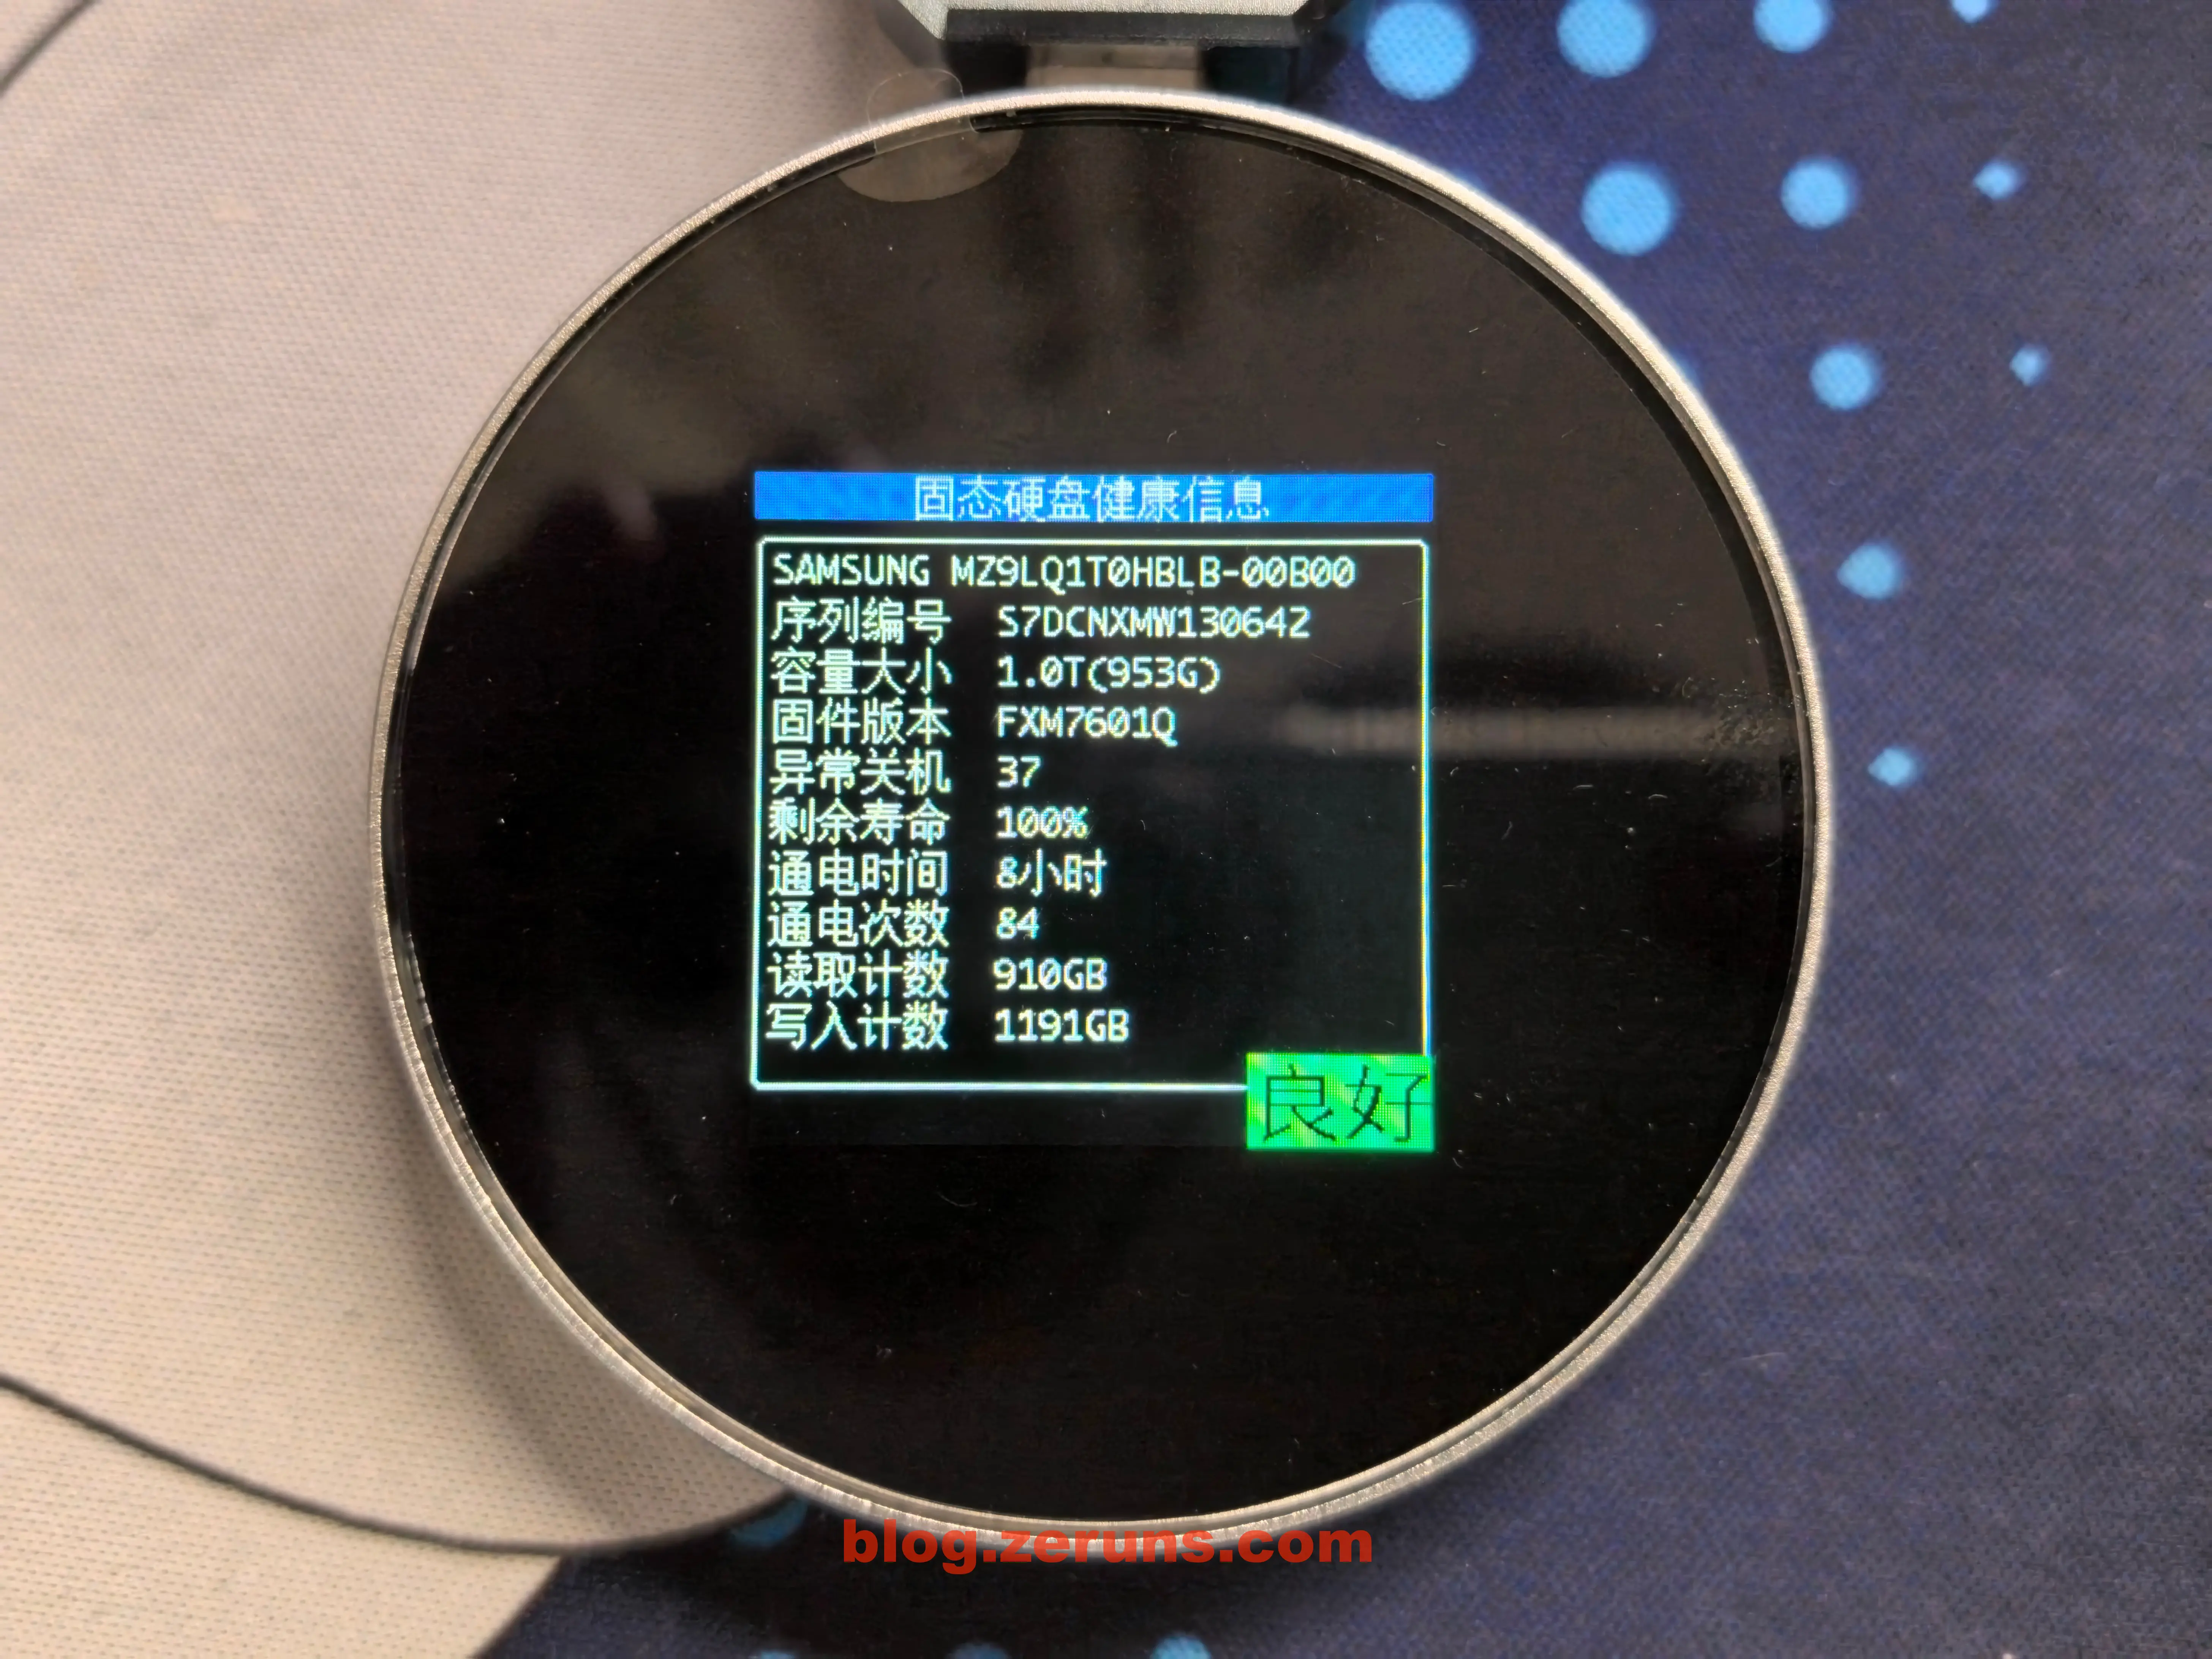
中枠のボタンを長押しし、「SSD情報」が表示されたら離すと、SSDの健康状態画面に移行。表示項目は、型番、シリアル番号、容量、ファームウェアバージョン、異常シャットダウン回数、残り寿命、通電時間、通電回数、読み取り回数、書き込み回数。
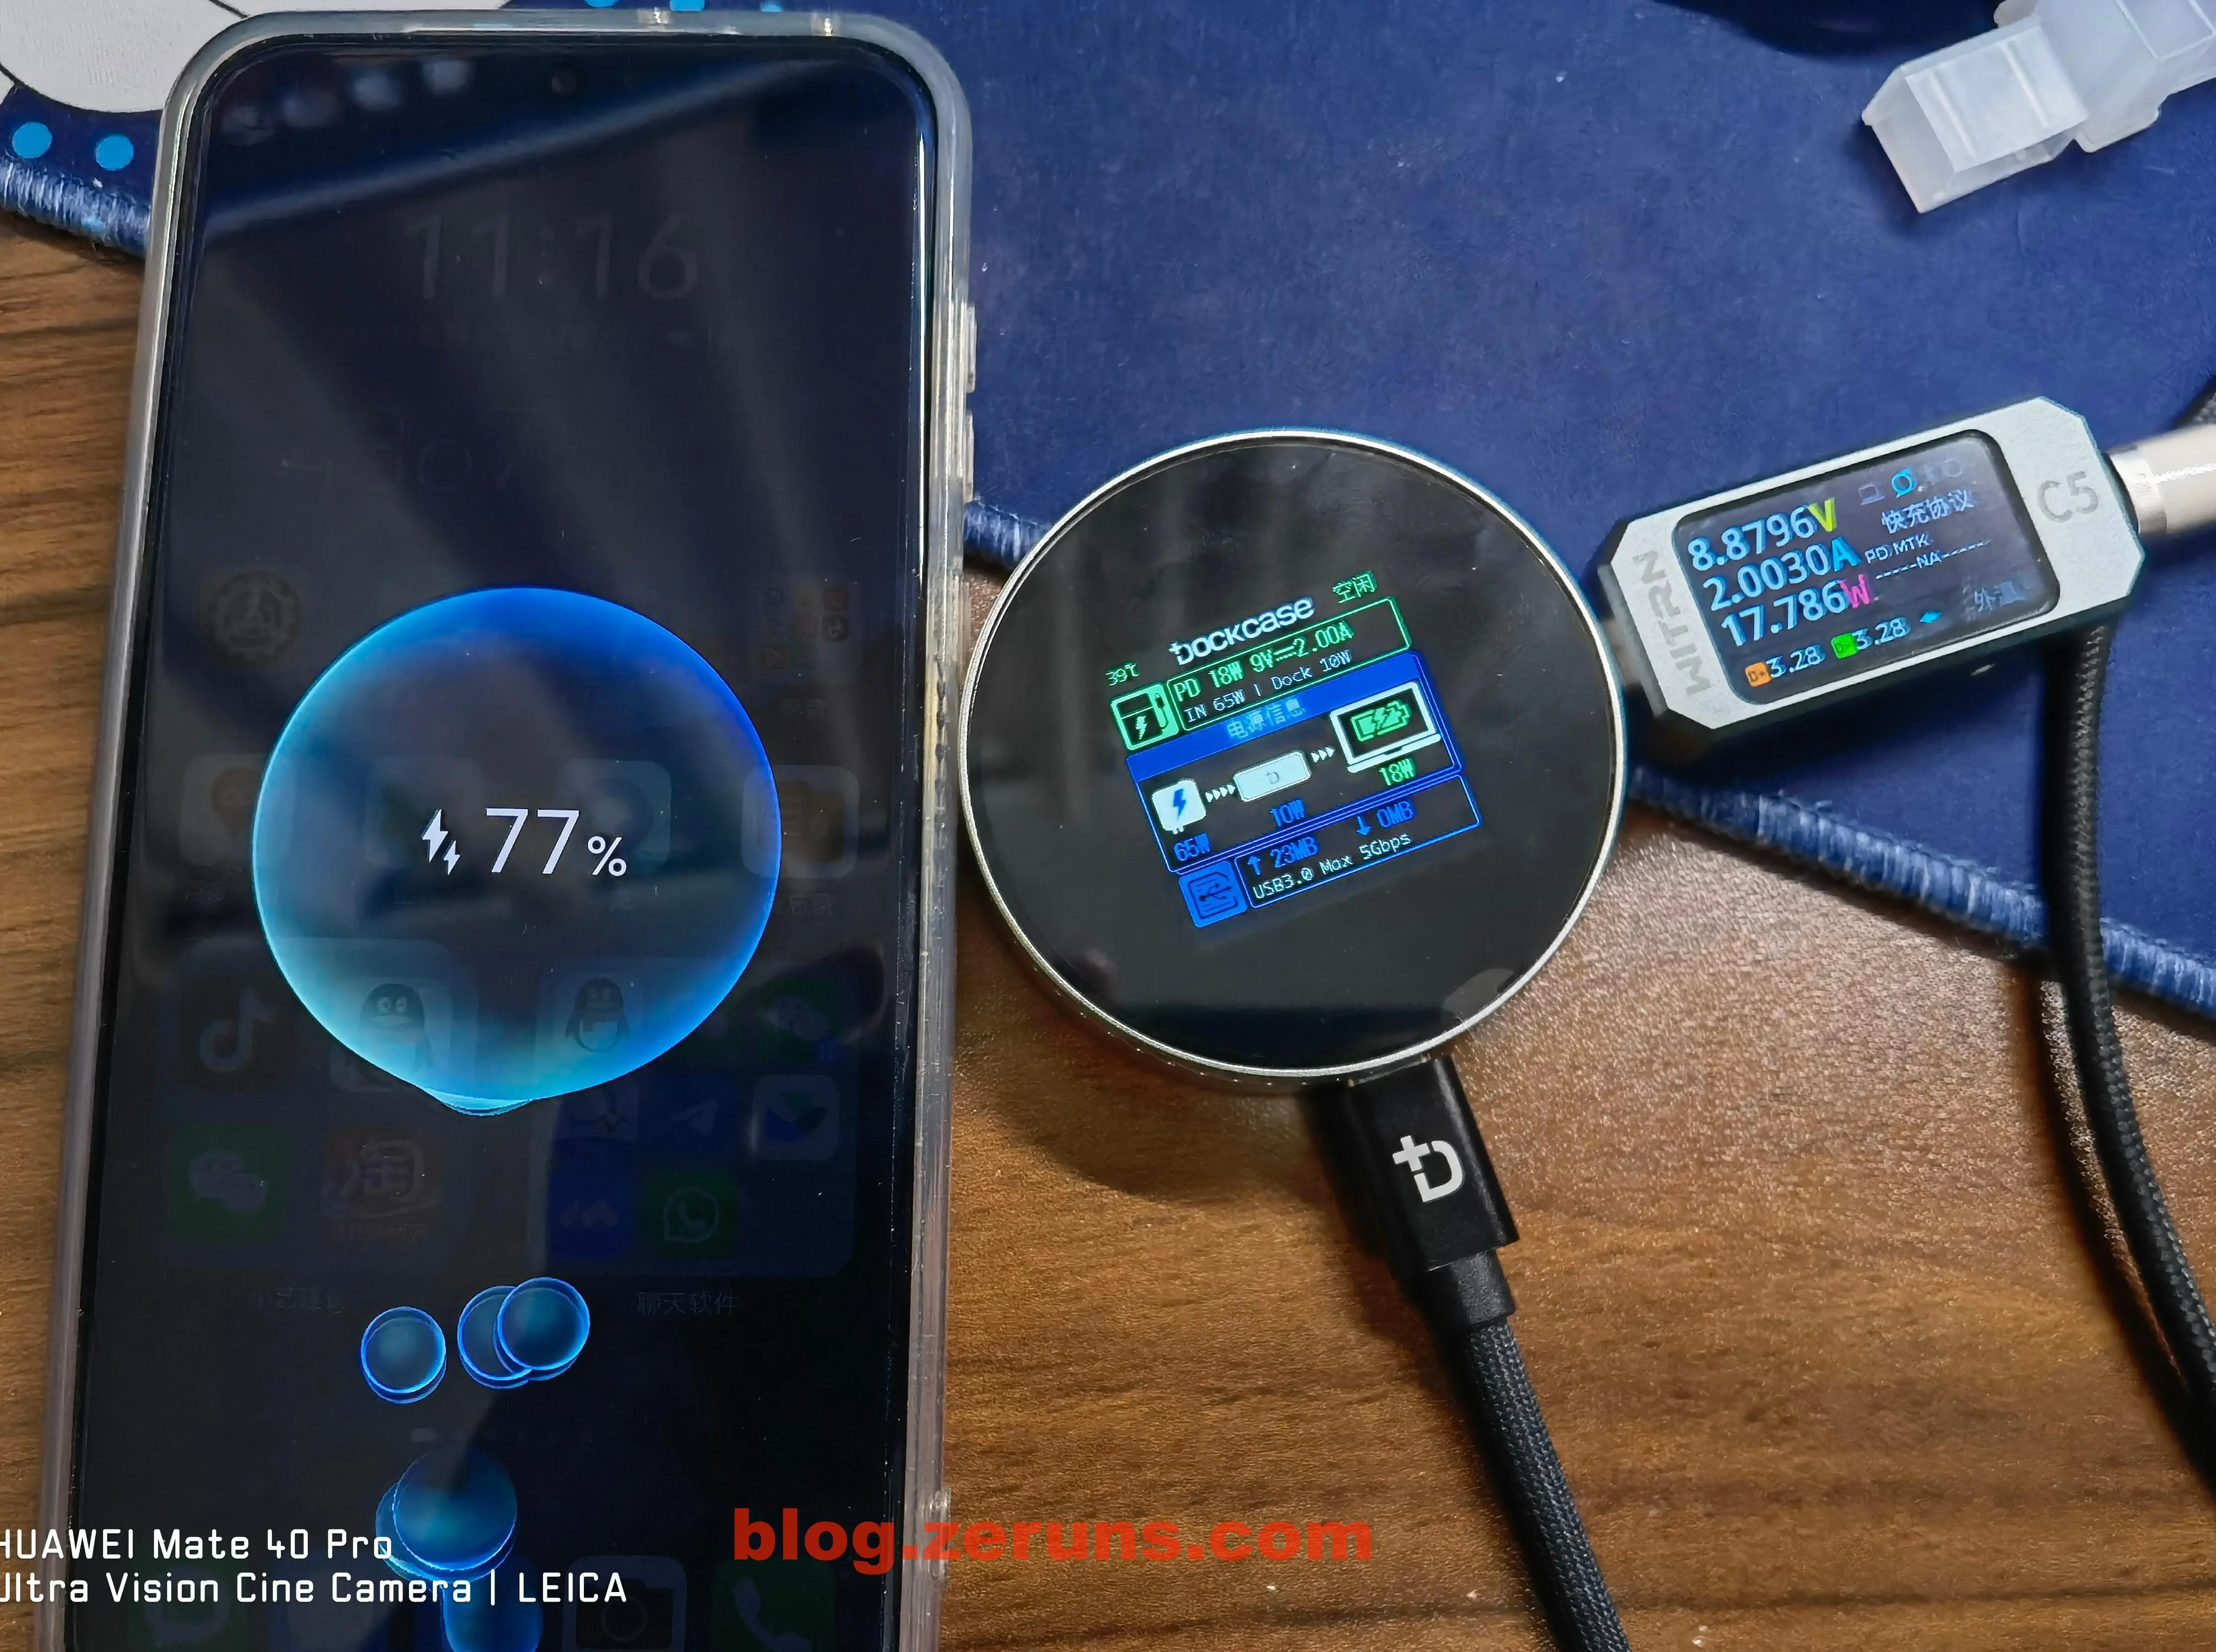
ハードディスクケースには2つのCポートがあり、片方をスマホ、もう片方をPD充電器に接続することで、充電しながら読み書きが可能。ただし、HuaweiスマホのPD対応最大出力は18Wのため、100W PDのテストはできない。
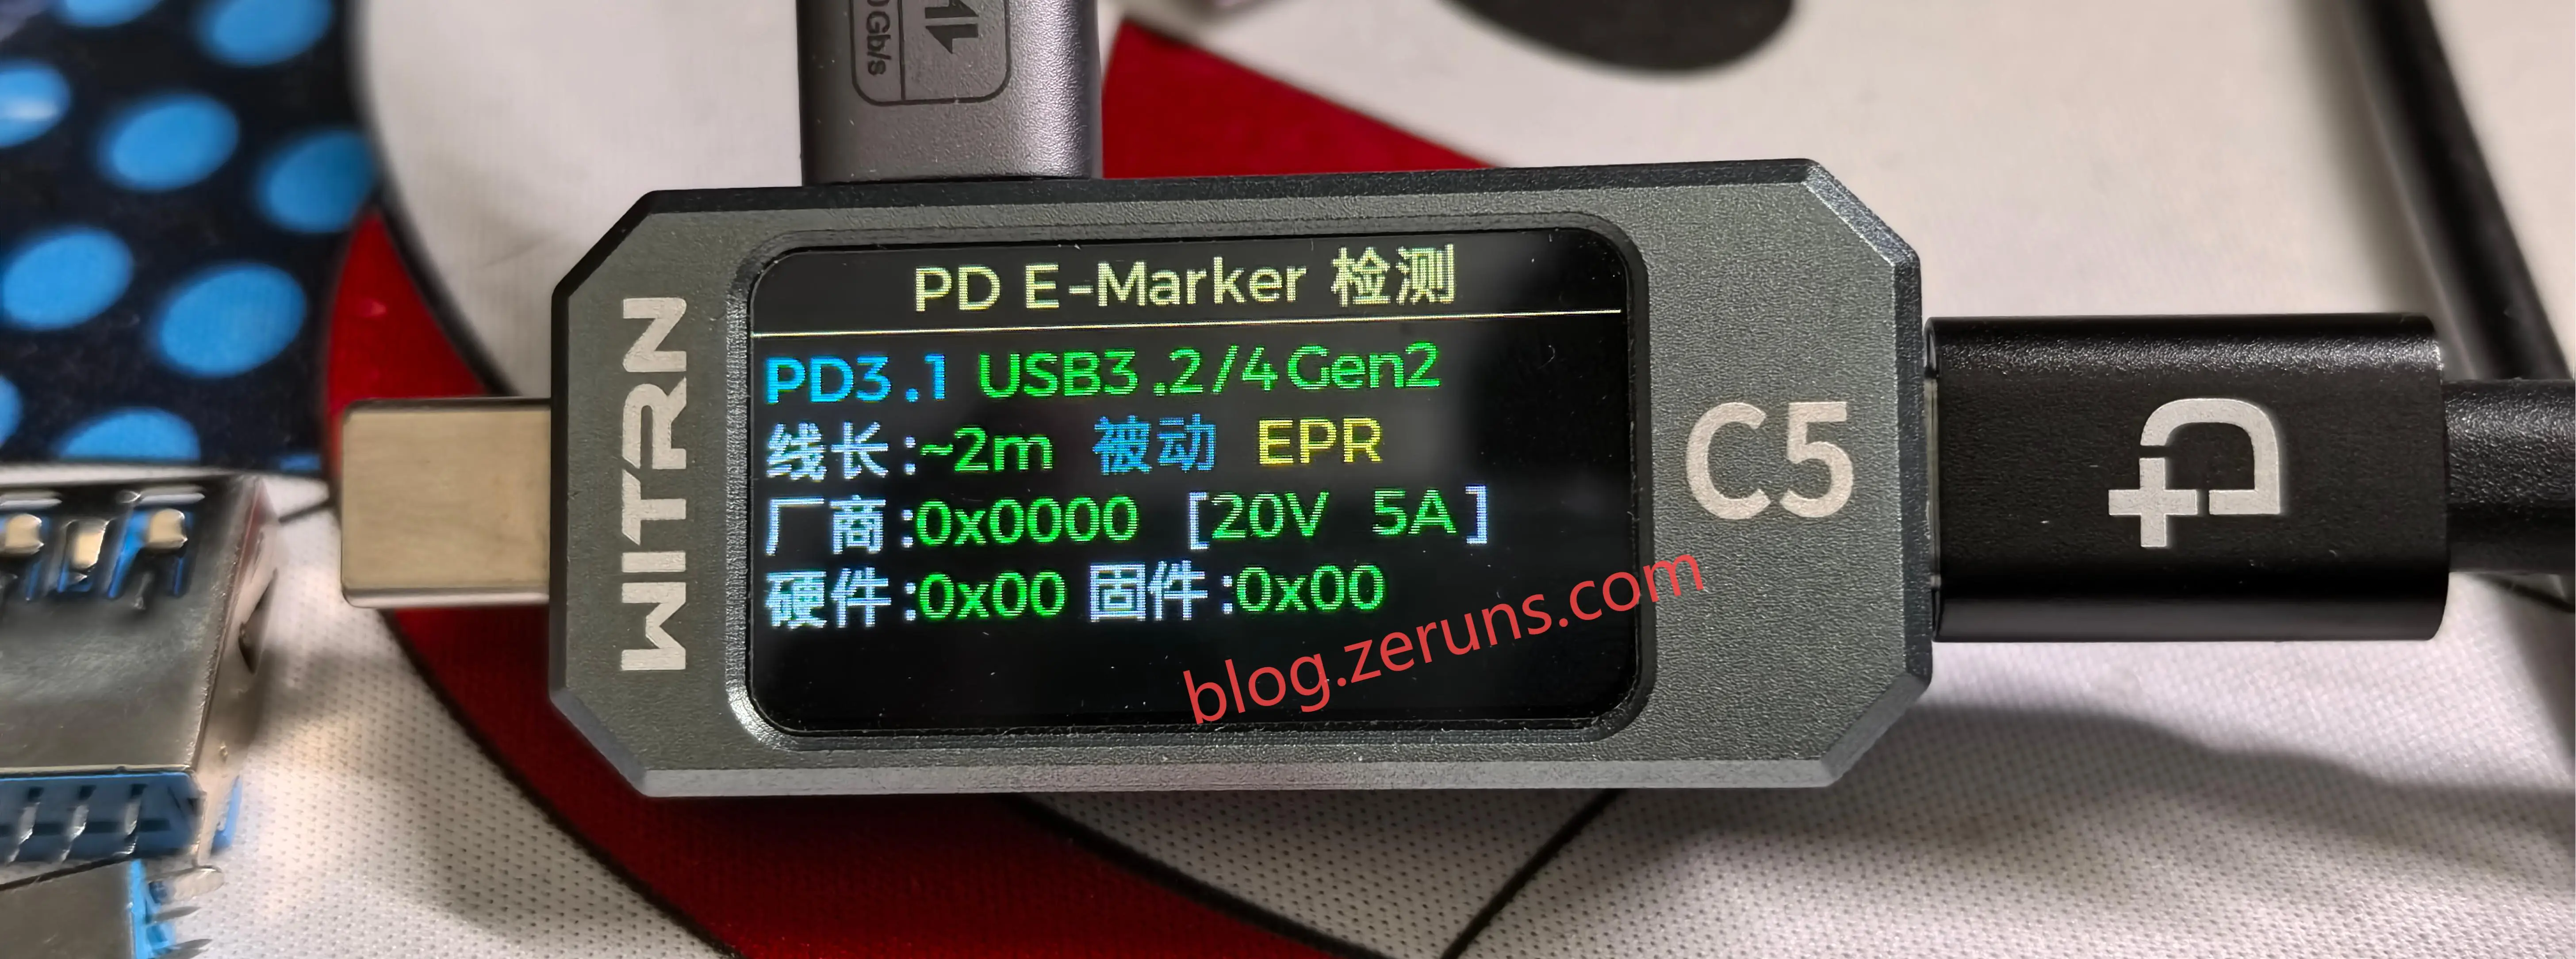
維簡C5チェッカーを使用し、付属データケーブルのE-Marker情報を読み取ったところ、USB3.2/4 Gen2対応、メーカーID 0x0000、PD3.1 20V 5A対応であることが判明。
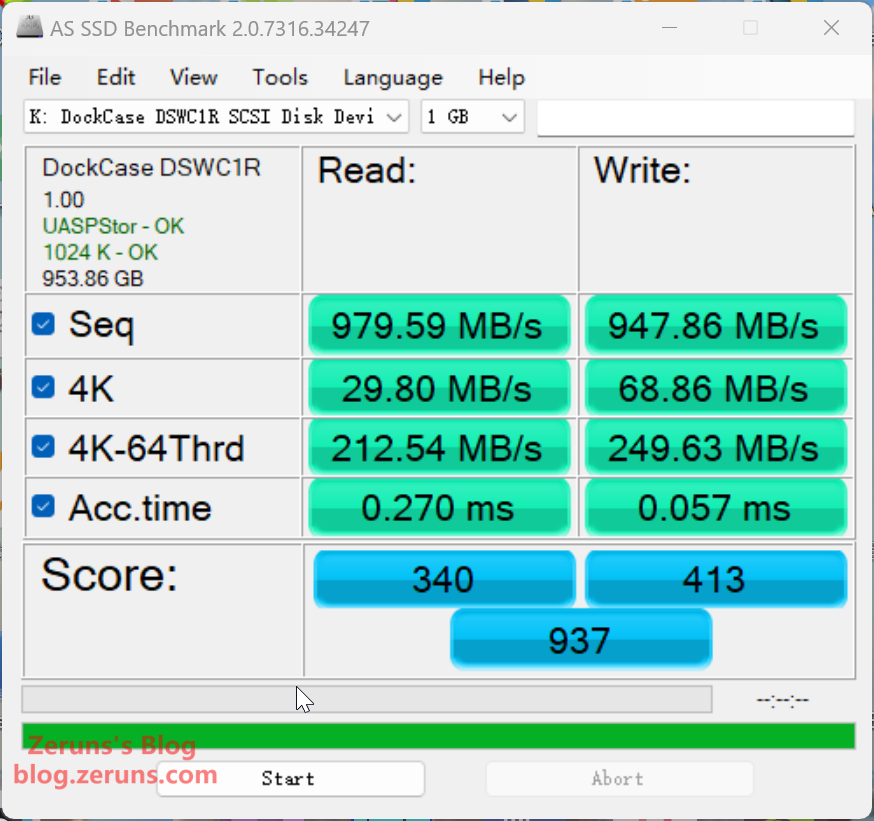
PCに接続し、AS SSD Benchmarkで速度測定。順次読み取り速度 979.59MB/s、順次書き込み速度 947.86MB/s、シングルスレッド4Kランダム読み取り 29.80MB/s、シングルスレッド4Kランダム書き込み 68.86MB/s。
ハードディスクケースをiPhoneに磁石で取り付け、データケーブルを接続すれば、スマホから直接読み書き可能。4K ProRes動画の外部記録も可能。Android端末には付属の磁気誘導リングを背面に貼れば、同様に磁石固定できる。

ハードディスクケース 発熱状態 熱画像
優利徳UTi261M熱画像カメラの開封レビューおよび撮影効果:https://blog.zeruns.com/archives/798.html
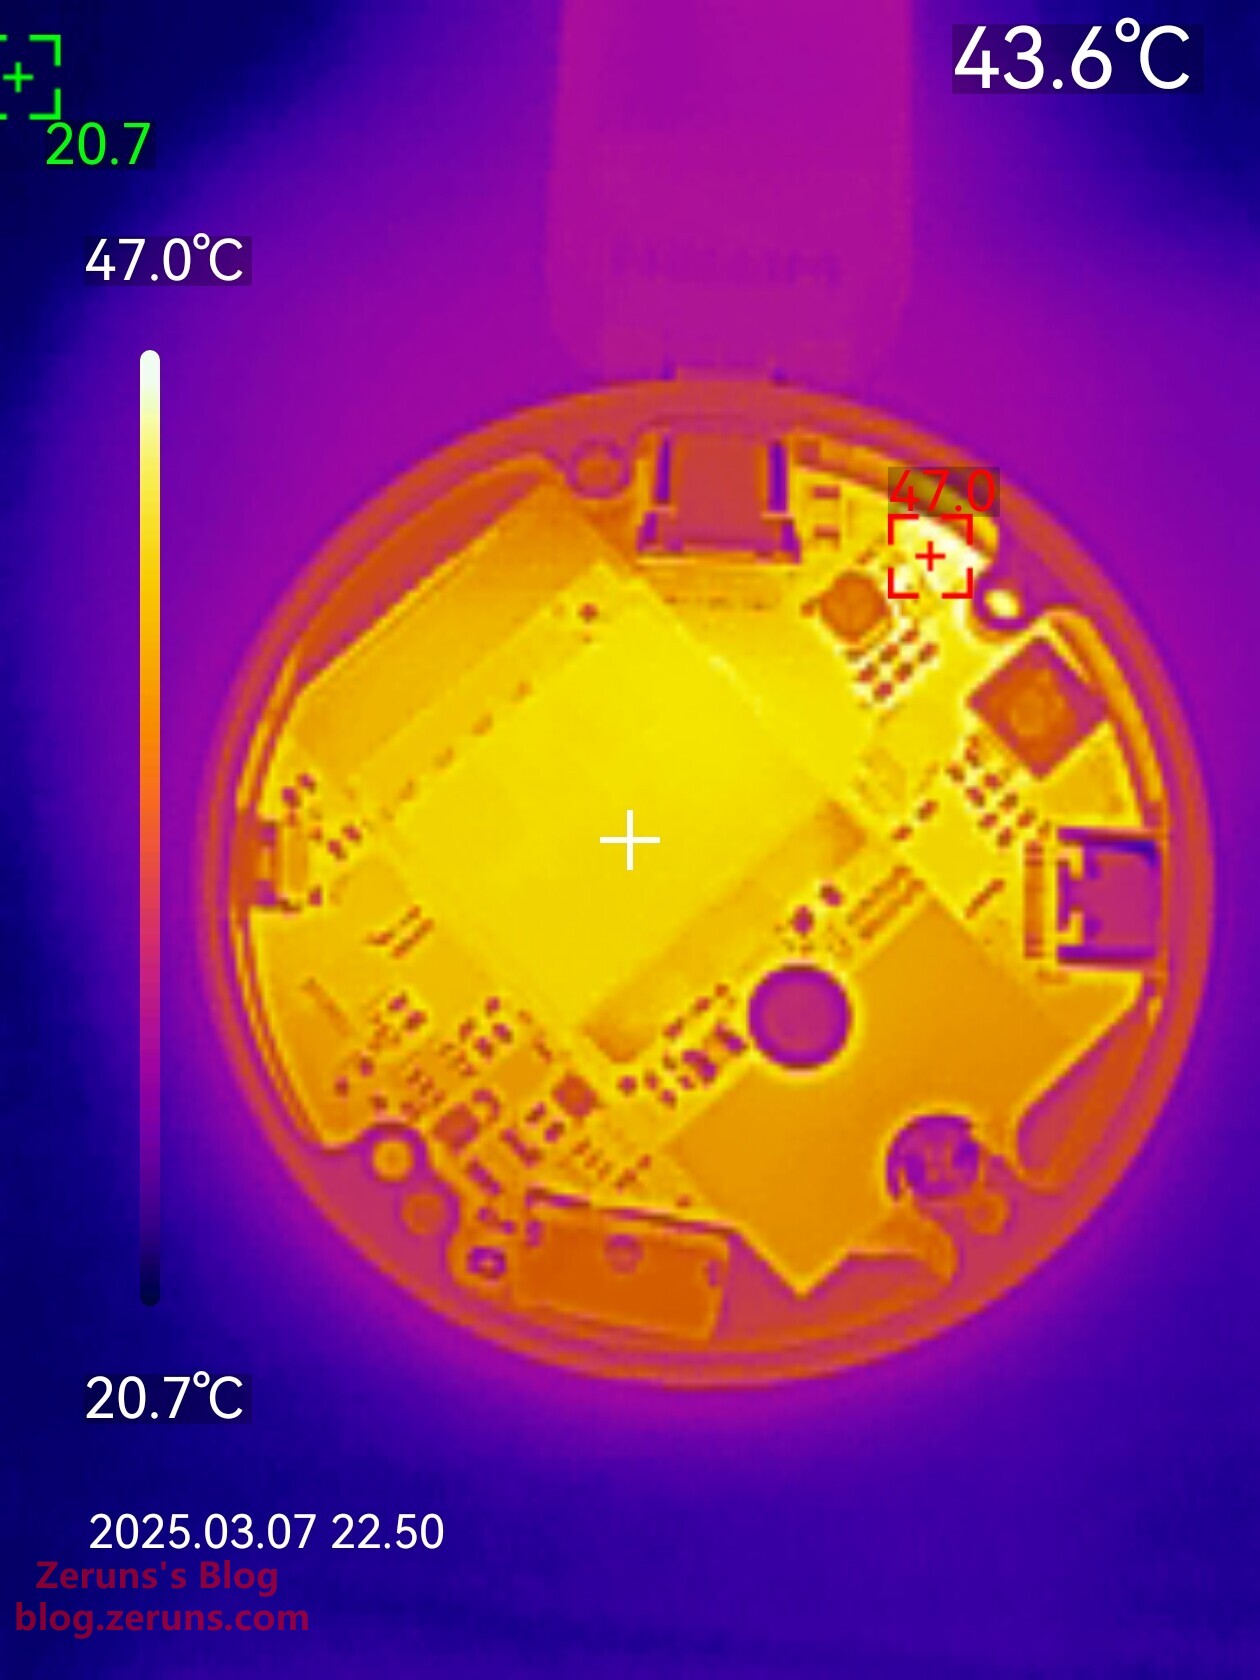
ハードディスクケースのアイドル時(データ読み書きなし)の熱画像。最高温度はPMOSトランジスタで47℃(周囲温度約20℃)。主コントローラチップは基板裏面にあるため、分解しないと見えない。別の同主コントローラのハードディスクケースレビューによると、主コントローラの動作温度は約55℃で、高くない。
読み書きフル負荷時の熱画像。主コントローラの温度が90℃以上に達する(底カバー未装着)。SSDと底カバーの間に追加で導熱パッドを挟むと(筆者は追加)、温度を60℃以下に下げられる。

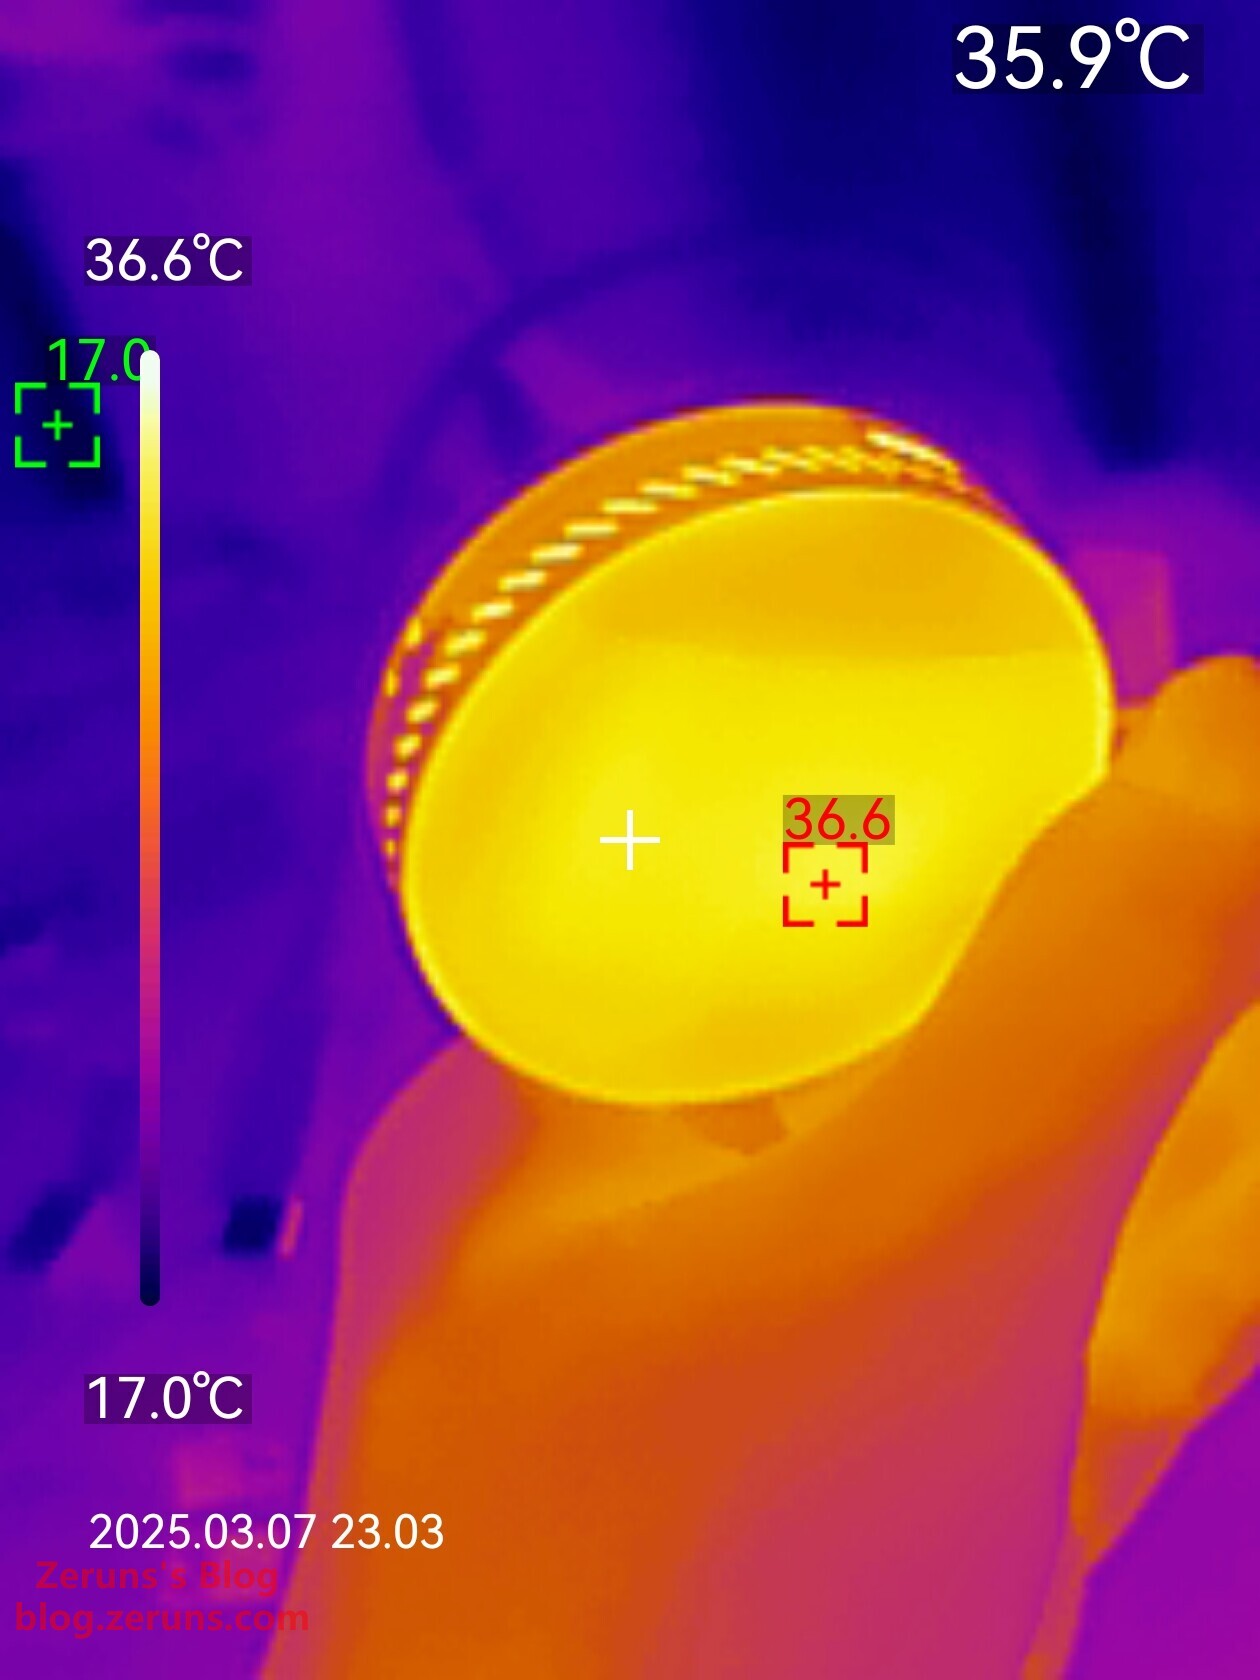
読み書きフル負荷時のケース表側熱画像。画面部分の最高温度は36.6℃。
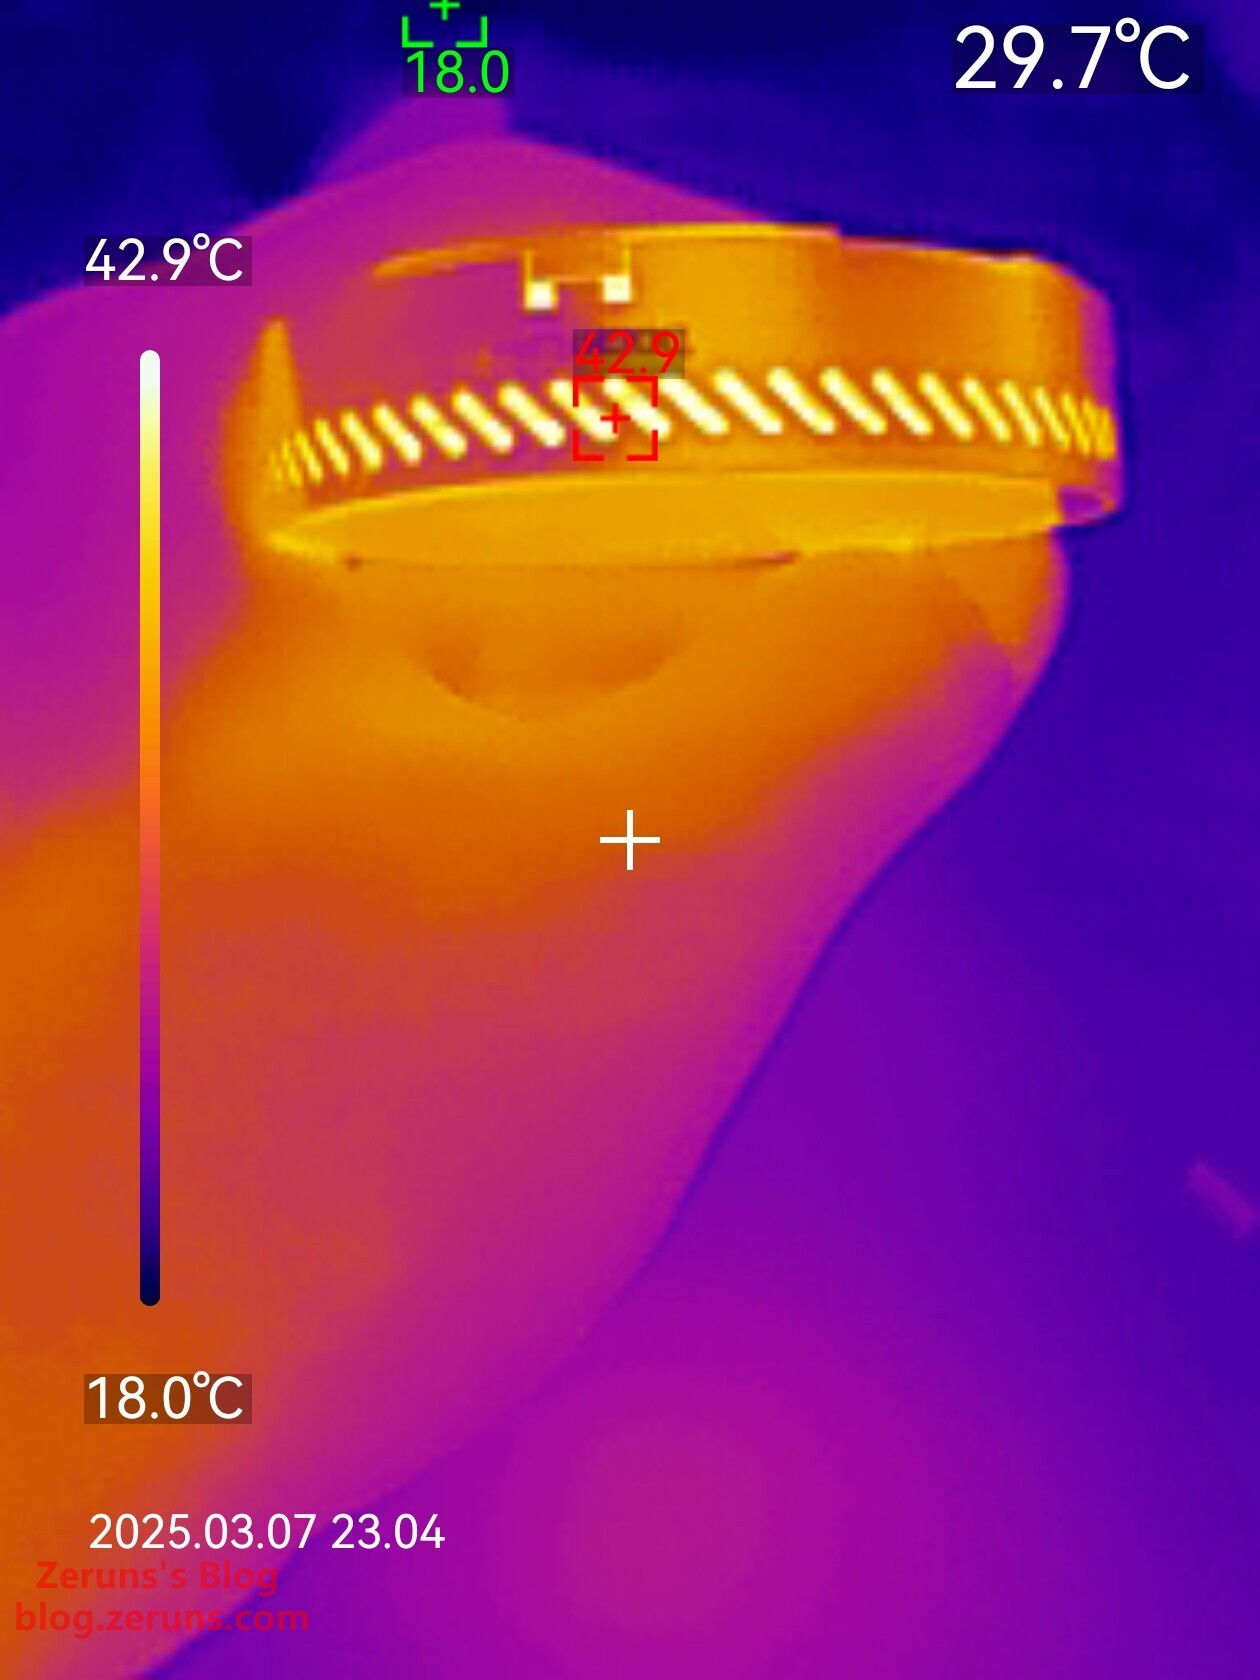
読み書きフル負荷時のケース側面熱画像。放熱穴から内部を覗くと最高温度42.9℃。
読み書きフル負荷時のケース底面熱画像。最高温度37.5℃。(金属の反射のため、熱画像では3つの黒色脚ゴムが高温に見える)
発熱量は控えめで、性能は良好。
おすすめ記事
- 高コスパで安いVPS/クラウドサーバーの紹介:https://blog.zeruns.com/archives/383.html
- Minecraftサーバー構築ガイド:https://blog.zeruns.com/tag/mc/
- 超高速サイト構築!1PanelパネルでHaloブログをワンクリックデプロイする完全ガイド:https://blog.zeruns.com/archives/858.html
- オープンソース 140W+65W昇降圧PD3.1急速充電モジュール(2C+1Aポート)、IP6557+IP6538:https://blog.zeruns.com/archives/801.html
- DeepSeek-R1のプライベートデプロイメントガイド|LinuxサーバーでAI大規模言語モデルを構築:https://blog.zeruns.com/archives/853.html
- 愛快 IK-Q3000 WiFi6ワイヤレスルーター 開封レビューと分解:https://blog.zeruns.com/archives/860.html